A (human) index that likes to code
Also drinks way too much coffee ![]()
Tutorial: ESP32 to AWS IoT to AWS DynamoDB (Part II)
Published Sep 05, 2019 12:30
Finally, the long-awaited (2 months) part II is here!
Pre-requisites
You must have completed Part I to continue with this tutorial, as this tutorial builds on the previous tutorial.
Linking up AWS IoT to DynamoDB
In the previous part, the ESP32 was linked to DynamoDB via MQTT, and it was possible to control the LED of the ESP32 by publishing a message via the AWS IoT testing console to the subscribed IoT topic. However, IoT is much more than just controlling devices from the cloud. There are some devices, known as “IoT Sensors”, which are able to report sensor data to the internet. Combined with the ability to control devices and with the massive power of Cloud Computing, this allows more powerful machines to make decisions based on the data collected from the sensors, then returning those results as commands to control devices based on inferences made from aforementioned data.
We can then integrate advanced computing techniques like Big Data and Machine Learning with IoT to better improve lives based around IoT products in a household. This vaguely composites into what is known as “Smart Home”; using a cluster of IoT sensors and actuators to: (i) cut utility bills, (ii) make living more convenient, and (iii) make living more entertaining (AndroidAuthority, 2019). Scale that to the size of a city, and the term becomes “Smart City”, making payments, transport, security, et. cetera more convenient.
Therefore, in this section, you will be modifying your handiwork in Part I to make it such that the ESP32 would publish a JSON object indicating that a button on the ESP32 has been pressed. This JSON object will then be mapped as columns on a DynamoDB table.
Looking at the ESP32 schematics:
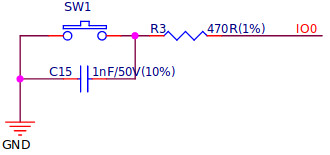
The schematics for the 'BOOT' button | Source
It appears that the ‘BOOT’ active-low button can be used as a typical button, which is perfect for the current use case.
Step Ichi
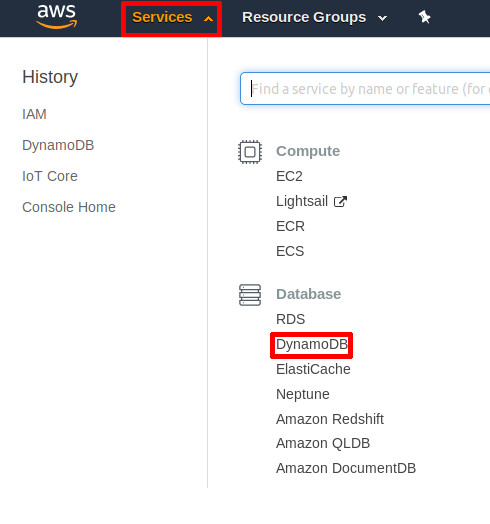
- Login to the AWS Management Console.
- Click on Services > DynamoDB (found under the section “Database”)
DynamoDB | Source: Me
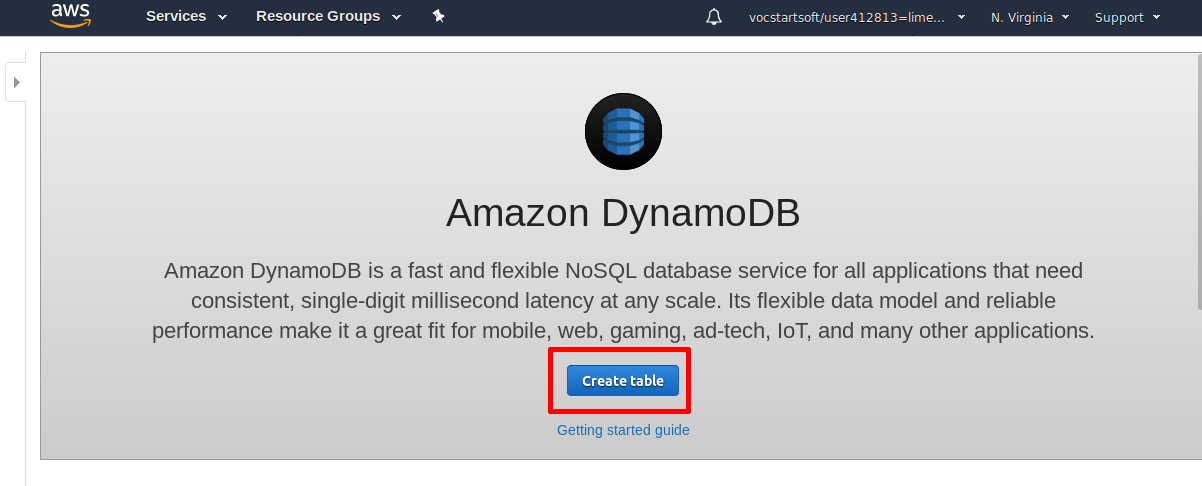
- If you’ve created a DynamoDB table before, you may see a different resultant screen. Click on Create table.
Click this if you don't already have a table | Source: Me
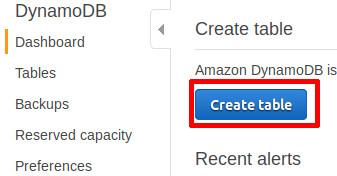
Click this instead if you already have tables | Source: Me
- Fill in Table name with whatever name you wish. For the purposes of this tutorial, it will be called “iot-table”. Call the partition key “uid”, as we will be generating a random UID per record. Then, click Create. (NOTE: If your account is limited and you are not allowed to create auto-scaling tables, please uncheck Use default settings and clear all options related to Auto scaling)
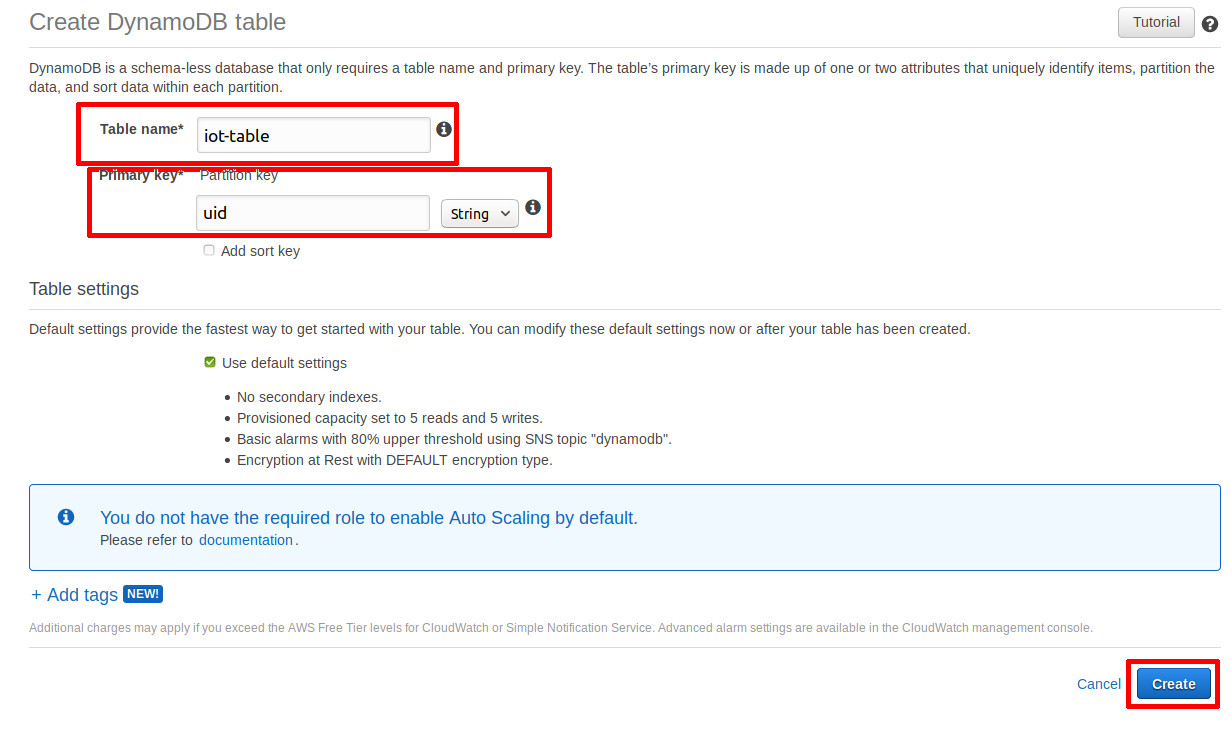
Table Creation Wizard | Source: Me
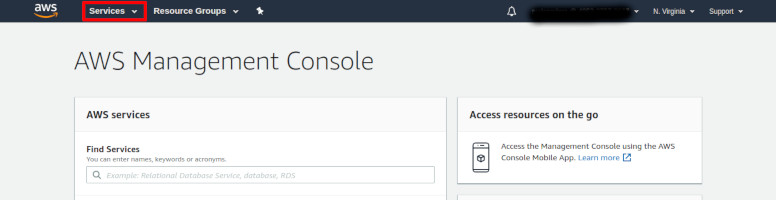
- Click on Services > IAM (found under the section “Security, Identity & Compliance)
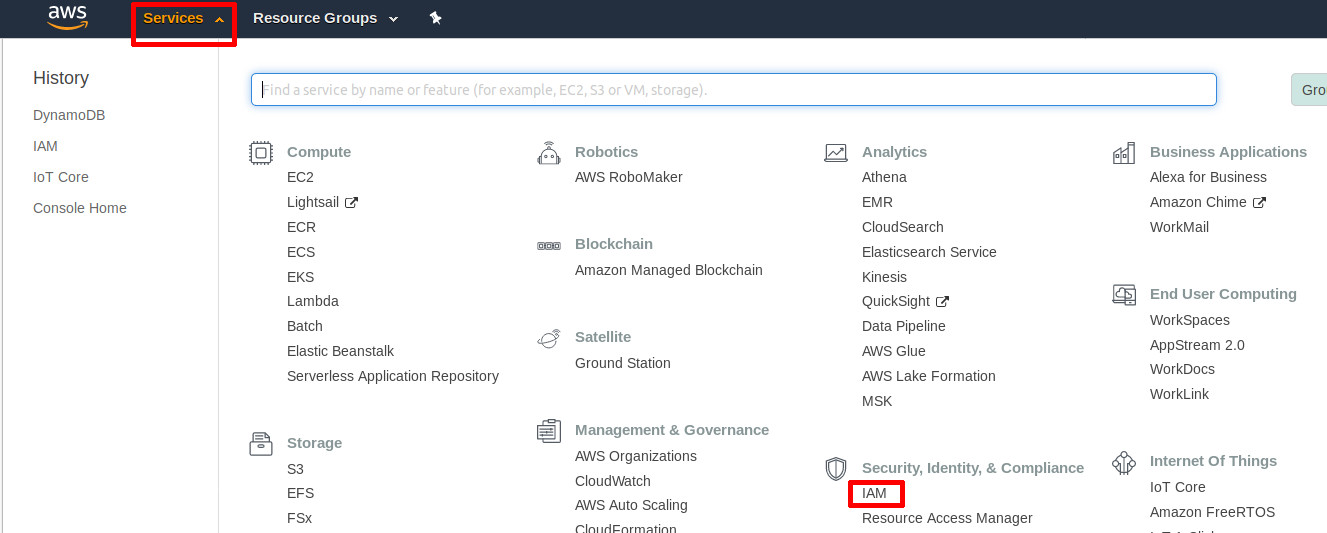
Click on IAM | Source: Me
- On the sidebar, click on Roles
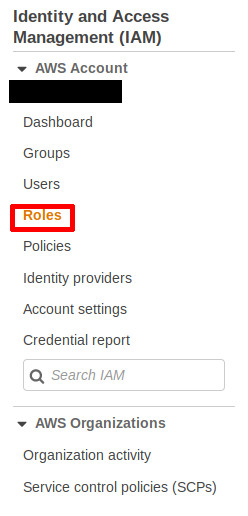
Roles | Source: Me
- Click on Create role.
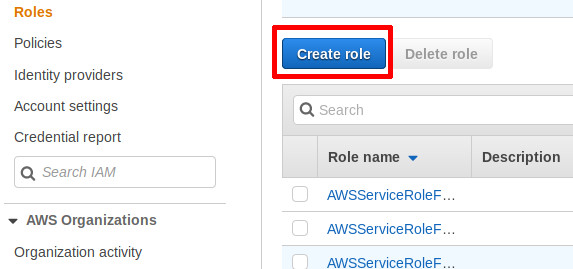
Create a role | Source: Me
- Click on IoT under the Choose the service that will use this role. Then, click on IoT under the Select your use case. Finally, click on Next: Permissions.
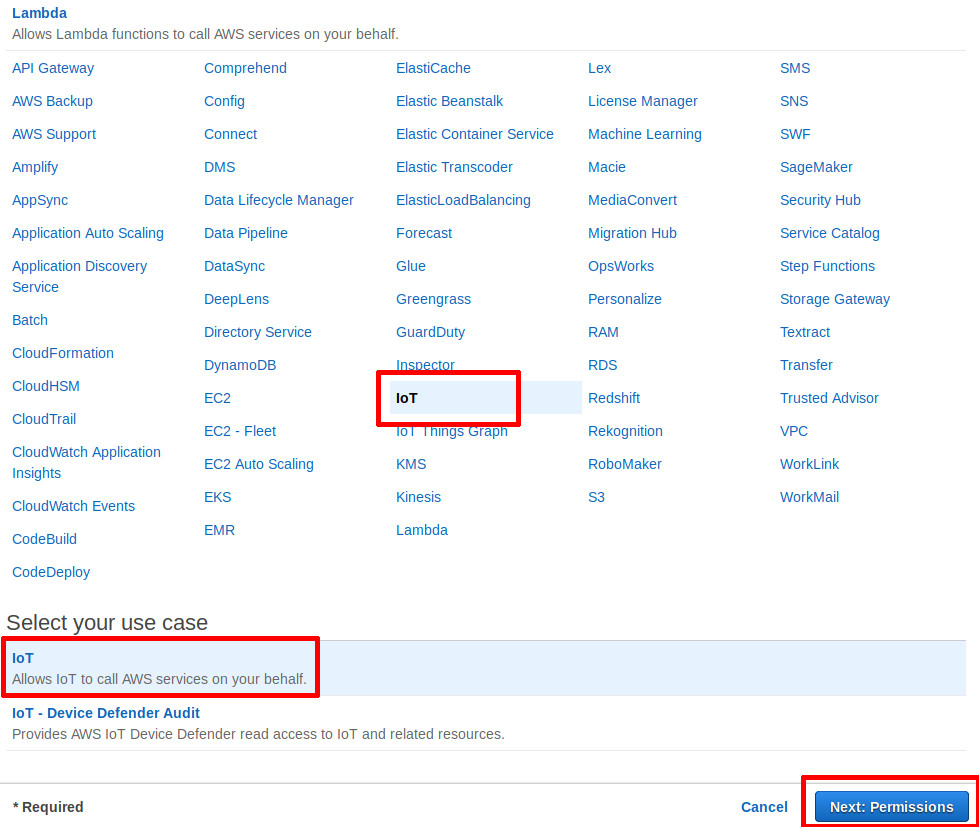
Choosing the service to use the role | Source: Me
- Click on Next: Tags.
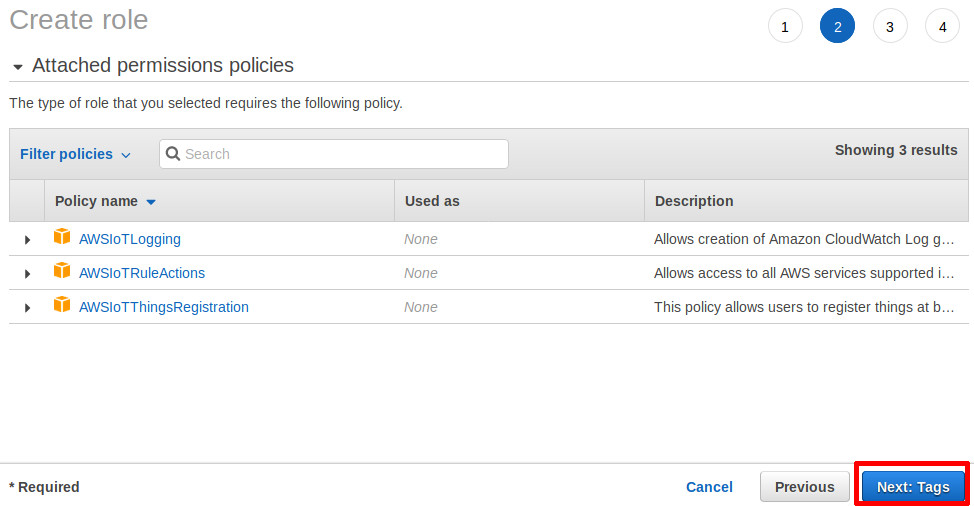
Next: Tags | Source: Me
- Click on Next: Review
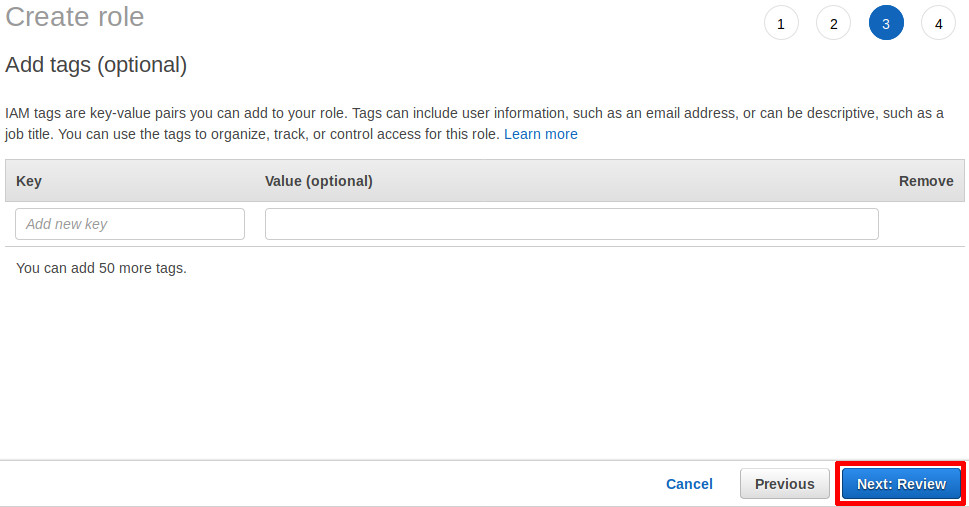
Next: Review | Source: Me
- Name the role whatever you wish (Field: Role name). For the purposes of this tutorial, it will be named “iot-role”. Then, click on Create role.
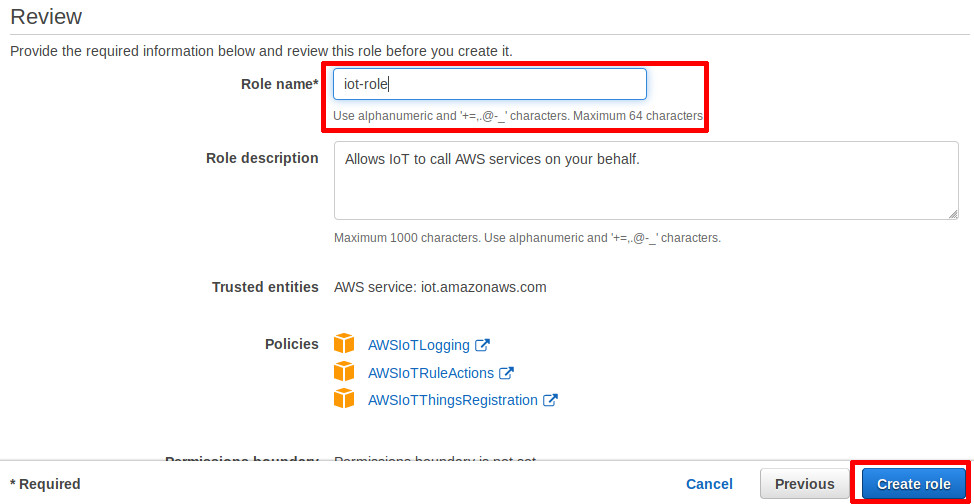
Create the role with a name | Source: Me
- Click on the role you have just created.
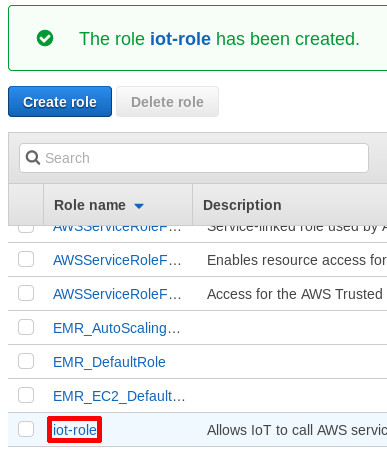
Click the role you have just created | Source: Me
- Click on Attach policies.
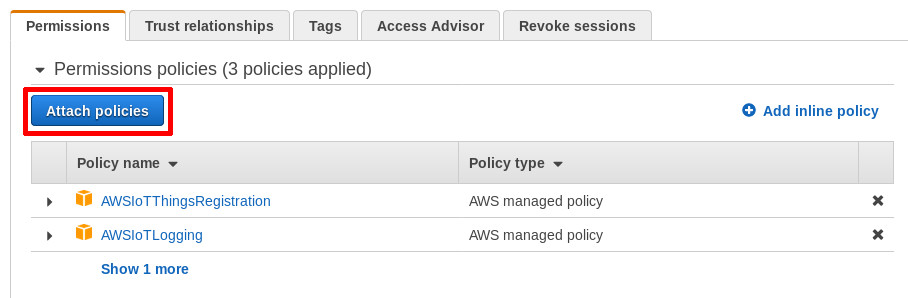
Attach Policies | Source: Me
- On the search bar, type “DynamoDB”, and select the AmazonDynamoDBFullAccess policy. Then, click Attach policy.

Search and select AmazonDynamoDBFullAccess | Source: Me
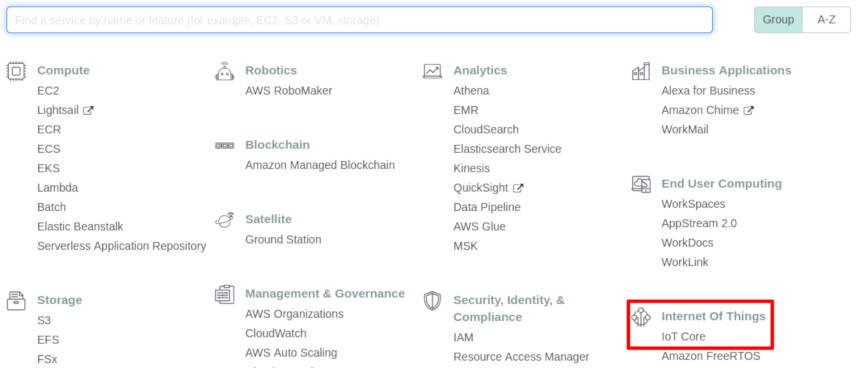
- Click on Services > IoT Core (found under the section “Internet of Things”)
Click on IoT Core | Source: Me
IoT Core | Source: Me
- On the sidebar, click on Act
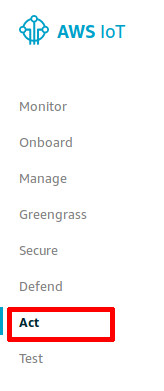
Act | Source: Me
- If you have not created a AWS IoT Rule before, click on “Create a rule”. Otherwise click “Create”.
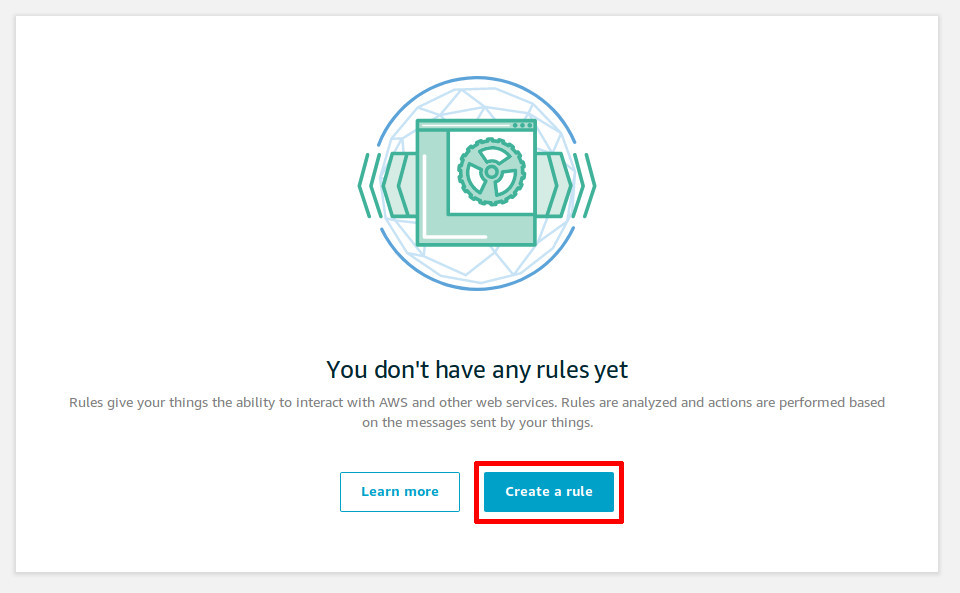
Create a rule (new user) | Source: Me
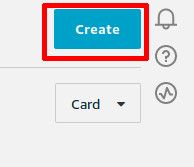
Create a rule (existing user) | Source: Me
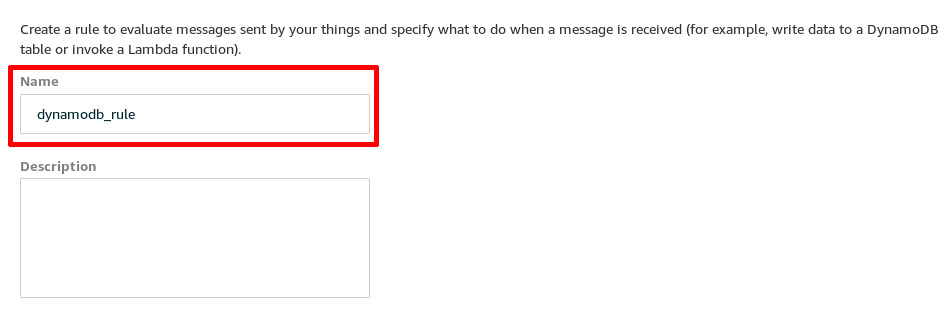
- Name the rule (the Name field). For the purposes of this tutorial, it will be named “dynamodb_rule”.
Name the rule whatever you want | Source: Me
- In the Rule query statement, use this SQL statement:
SELECT newuuid() AS uid, timestamp() AS timestamp, * FROM 'another/topic/hello'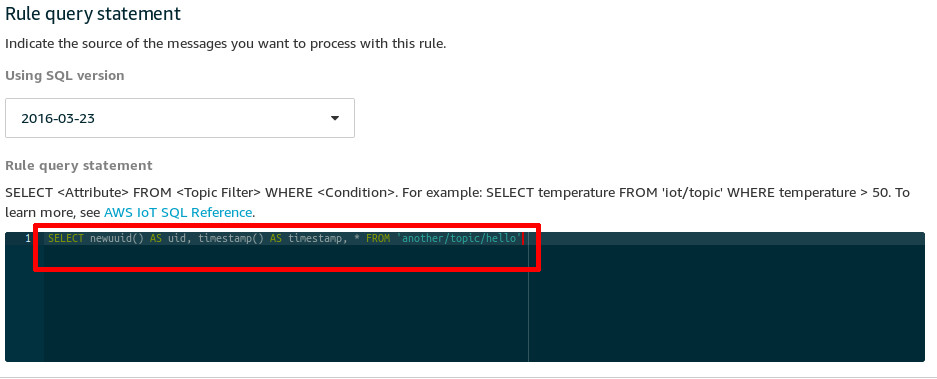
Put the SQL statement into the Rule query statement field | Source: Me
- Click on Add action under the Set one or more actions section.

Click on the Add Action button | Source: Me
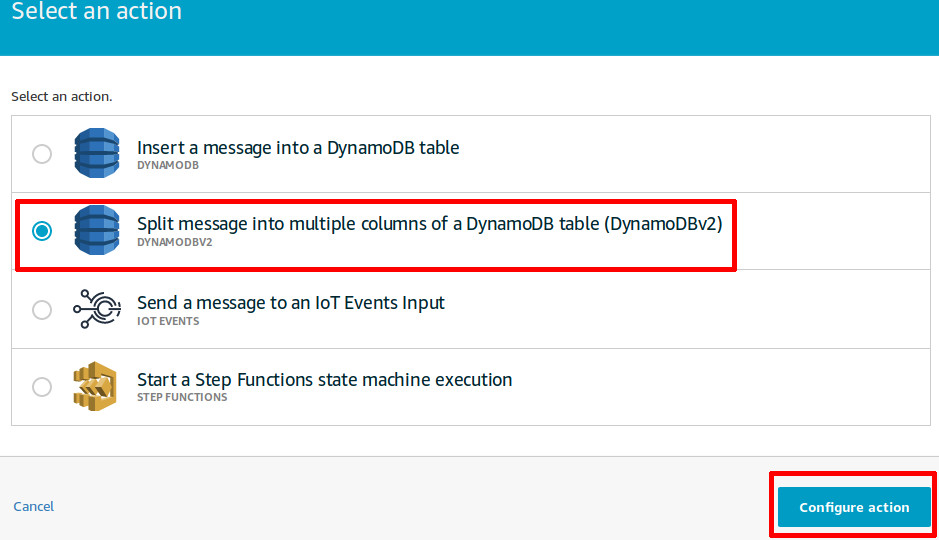
- Check the Split message into multiple columns of a DynamoDB table (DynamoDBv2) option, and scroll down to click Configure action button.
Configure the action | Source: Me
- Select the corresponding Table name created in step 4. Select the corresponding role created in step 11, by first clicking on Select, then selecting the role with the subsequent Select button. Finally, click Add action.
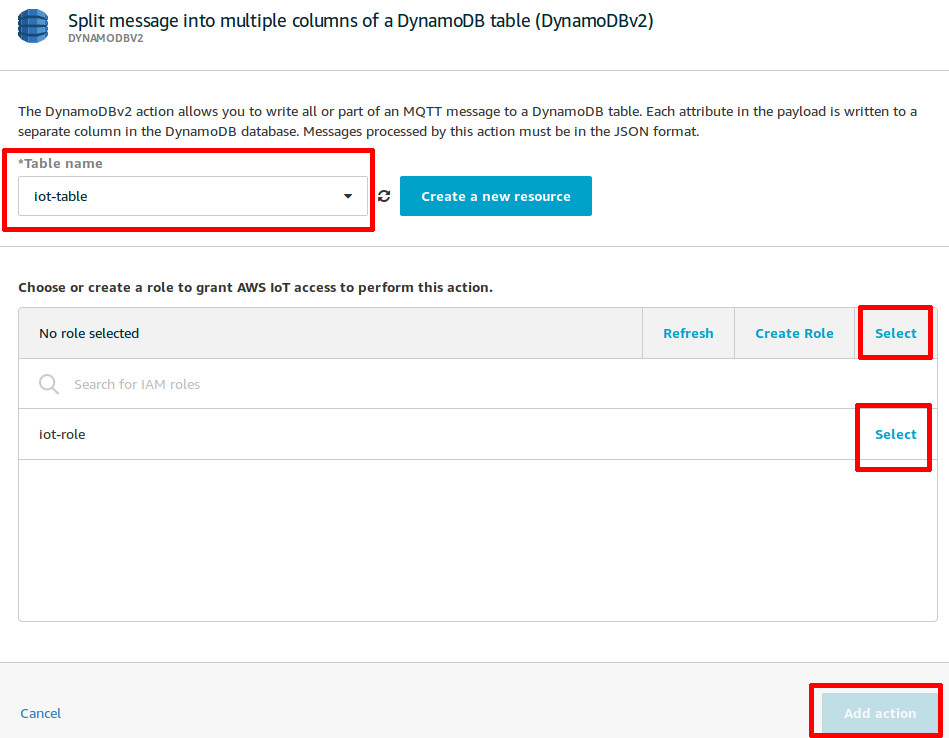
Table name, and IAM role | Source: Me
- Back on the rule creation wizard, click on Create rule.
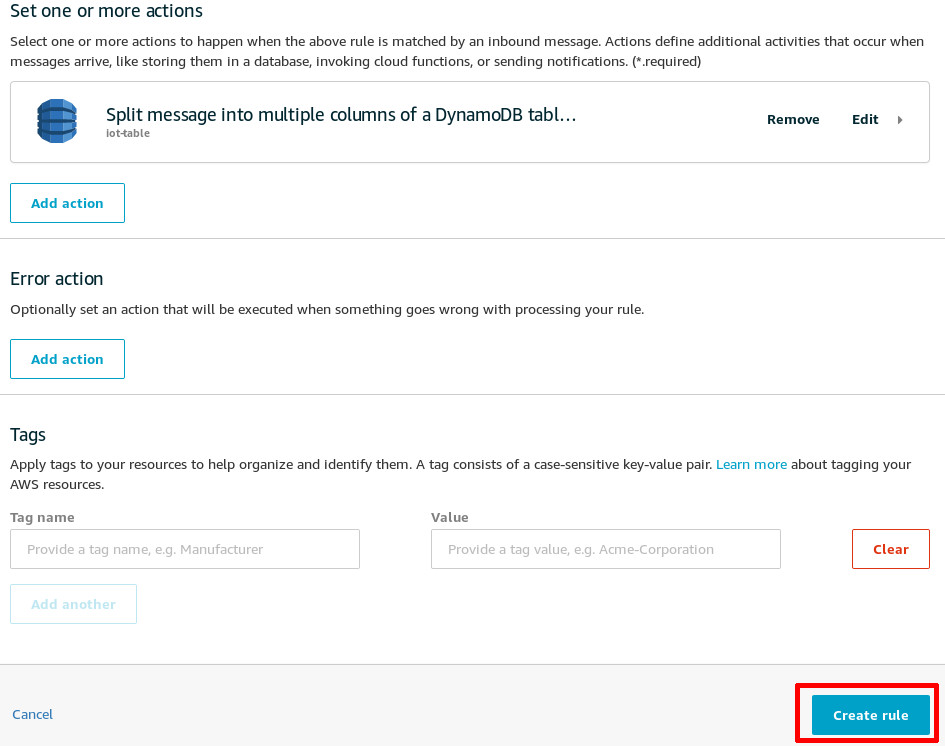
Create the rule | Source: Me
Step Ni
Now that the AWS services are setup properly, it is time to update the Arduino code. Replace (or selectively replace, if you know what you’re doing) the old code with new code from this gist. Here is the summary of the changes made since the previous Arduino program:
- Recieving a message from the subscription topic no longer echos to the publishing topic;
- Button is programmed to send a message (a JSON object containing the state of the LED) to the publishing topic.
Ensure that the ssid, password, aws_iot_hostname, aws_iot_sub_topic, aws_iot_pub_topic, ca_certificate, iot_certificate and iot_privatekey are filled in correctly, as described in the previous tutorial’s Step Dos.
Plug in the ESP32, select the port, and upload. Open the serial console to see debugging information, if desired.
Step San
- Go back to the AWS Console, and revisit Services > DynamoDB.
DynamoDB | Source: Me
- On the sidebar, click on Tables
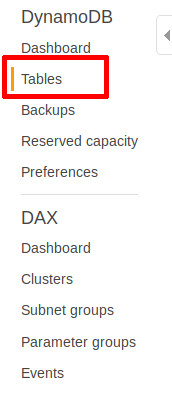
DynamoDB sidebar | Source: Me
- Click on the table you created, and then click on the Items tab.
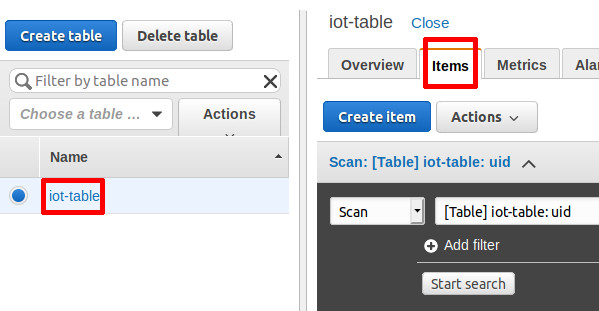
View items in the table | Source: Me
- On the physical ESP32 device, press and release the ‘BOOT’ button once.
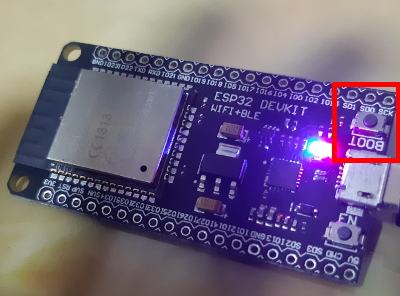
Press this button once | Source: Me
- Click on the refresh icon, located on the top right of the DynamoDB items table. You should see a new entry. Try pressing the ‘BOOT’ button on the ESP32 device a couple more times to see new records coming in.
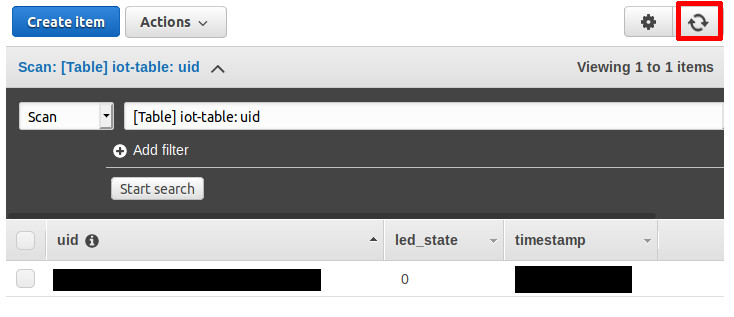
The refresh button | Source: Me
- Ensure that previous functionality of turning on / off the LED through the subscription topic still works.
What did I just do?
Now, you have a means to control a device, and a means to get device information from the ESP32. If all you need is to store the state of IoT things, including the state history, AWS IoT provides a feature to do just that - it is known as “Shadow Document”, which allows an IoT device to be stateless while reporting information to AWS IoT, which can keep track of state. You can learn more about that here.
However, for our application, we want to process data as it comes in; computing something from the device information so that we can control the said device. Hence, we don’t have a need for the Shadow Document; instead, we opted to use a database like DynamoDB. You can learn more about DynamoDB here.
Hence, we still have a missing step; the part where we process the data. (Part III? wink wink)
Conclusion
IoT is an important topic, and should be accessible to everyone. Studying IoT not only includes learning how to actually implement it, but includes other important aspects, such as security (our solution is not very secure, to make it easier to achieve certain steps), connectivity, and scaling.
Do look out for Part III!
Happy Coding,
CodingIndex