A (human) index that likes to code
Also drinks way too much coffee ![]()
Tutorial: ESP32 to AWS IoT to AWS DynamoDB (Part I)
Published Jun 22, 2019 12:00
You read the title, let’s get started. For this tutorial, we will be using the Arduino IDE. This should be possible with ESP-IDF, too, because ESP-MQTT is included as part of the ESP-IDF.
Tested on
This tutorial was created on Ubuntu 18.04.
Pre-requisites
Before the tutorial begins, please download the following pre-requisites (the version numbers are the versions used to create this tutorial):
- Arduino IDE - 1.8.9
- Python - 3.6.8
Setting up prerequisites
Arduino IDE
- Download the Arduino IDE if you don’t already have it.
- Start Arduino, then select File > Preferences.
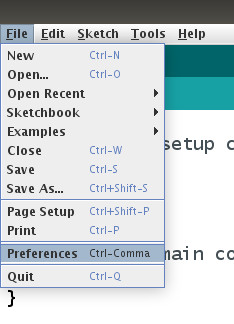
File > Preferences | Source: Me
- Under ‘Additional Board Manager URLs’, add this URL:
https://dl.espressif.com/dl/package_esp32_index.json.
Adding a board manager url | Source: Me
- Goto Tools > Board > Boards Manager and type in
esp32on the search bar. You should find the esp32 package. Install version1.0.2.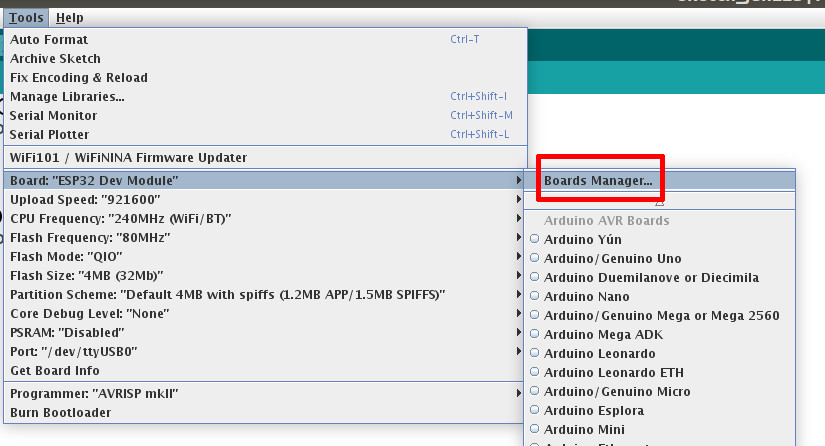
Board Manager | Source: Me
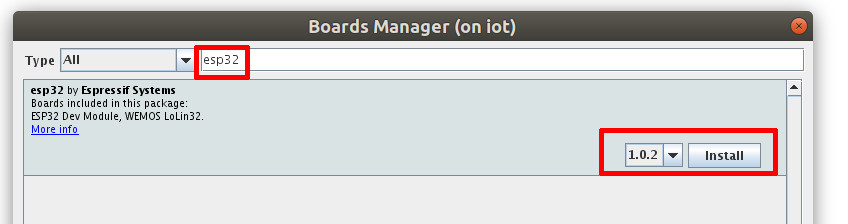
ESP32 Package | Source: Me
- Goto Tools > Manage Libraries. Then, search for
PubSubClient, and install version2.7.0.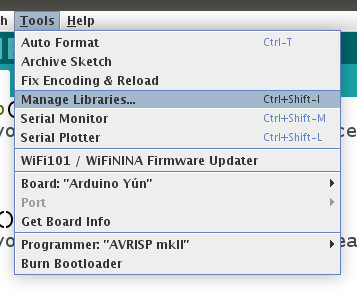
Manage Libraries | Source: Me
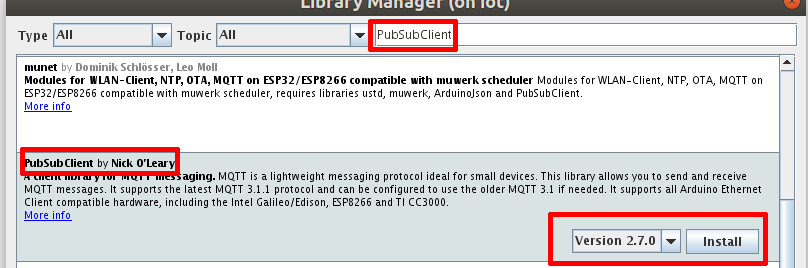
Install PubSubClient library | Source: Me
- Select Tools > Board > ESP32 Dev Module. Leave all new options to their default settings.
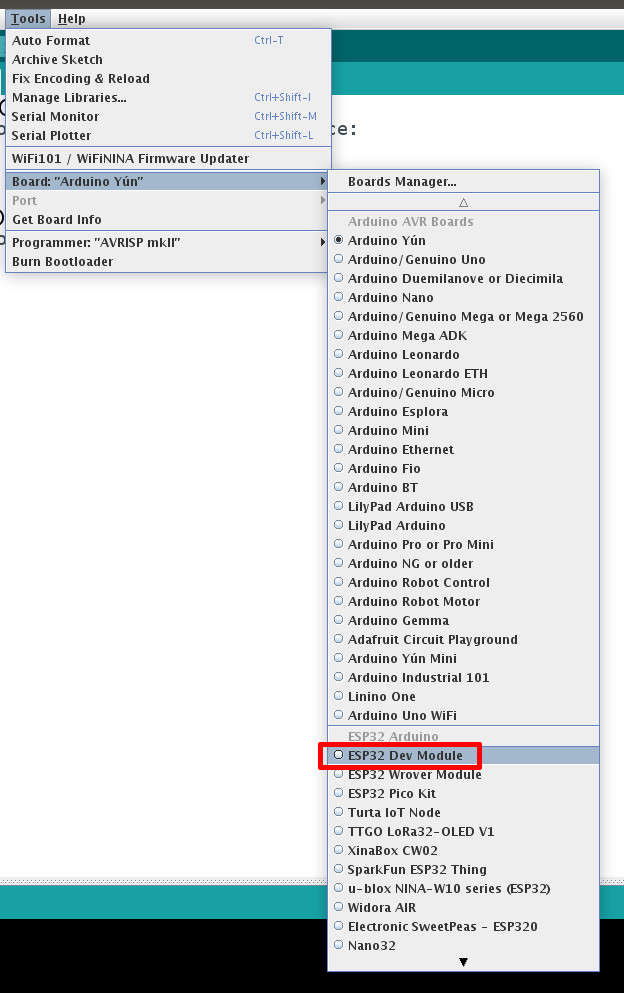
Click on it to change the board | Source: Me
Python
Run through all the installation steps for Python. If you are on Ubuntu, run sudo apt install python python-serial.
Linking up ESP32 to AWS IoT
Step Uno
- Login to the AWS Management Console.
- Click on Services > IoT Core (found under the section “Internet of Things”)
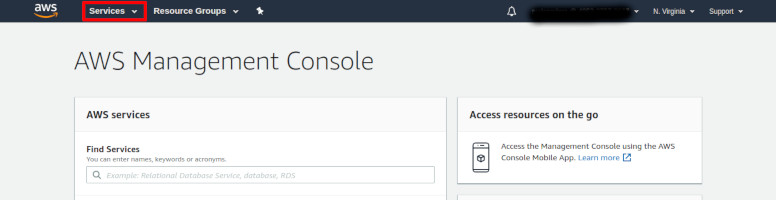
Click on Services | Source: Me
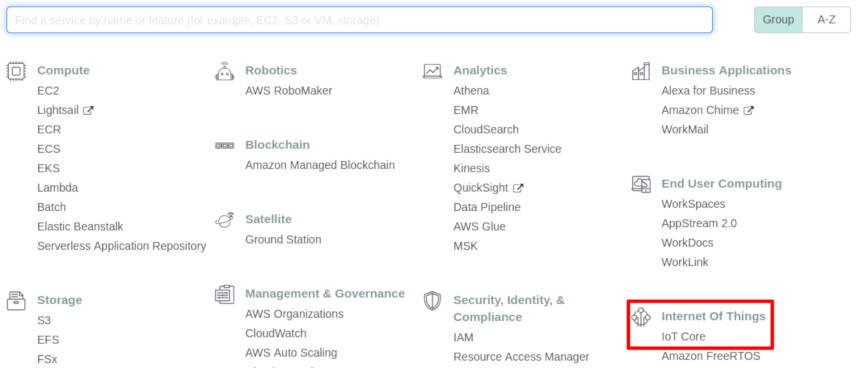
IoT Core | Source: Me
- On the sidebar, goto Secure > Policies, and click on “Create a Policy” or “Create”, depending on which one is present.
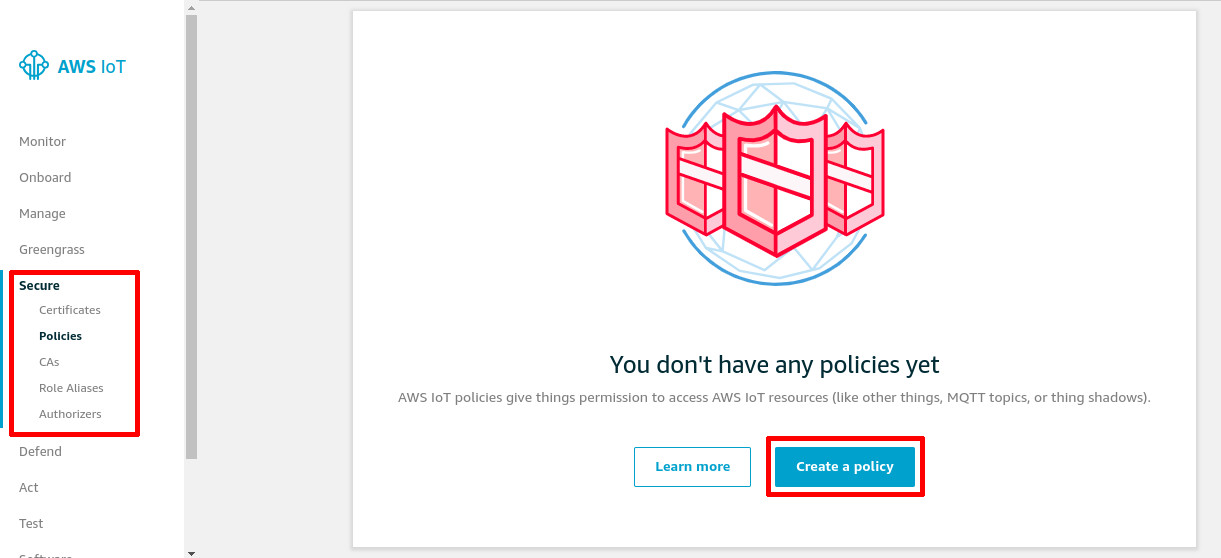
Create IoT Policy | Source: Me
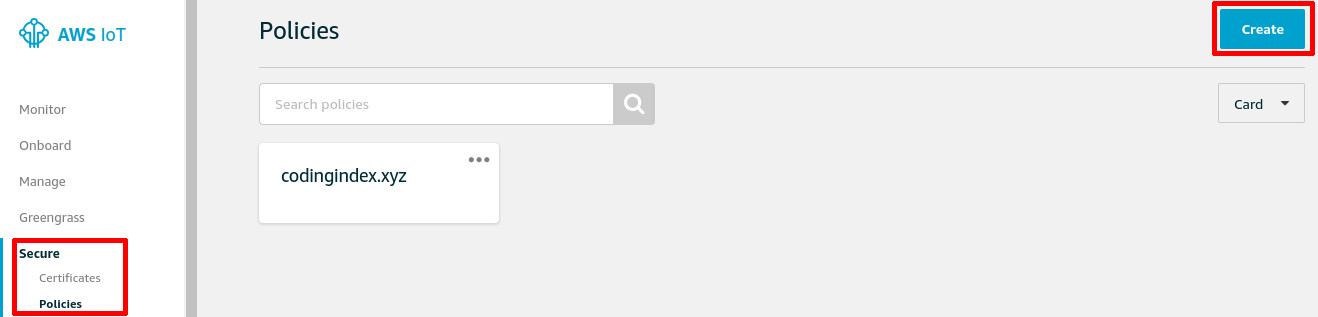
If you already have policies, use this button instead | Source: Me
- A wizard should appear. Name your policy through the Name field, key in
iot:*into the Action field, key in*under the Resource ARN field, and finally, check the ‘Allow’ box under Effect. Should you wish to restrict your policy more for higher security, or prevent other authorized (yes, authorized) users from using your topic, please refer to this AWS Documentation to construct your own policy. After checking your fields, press Create.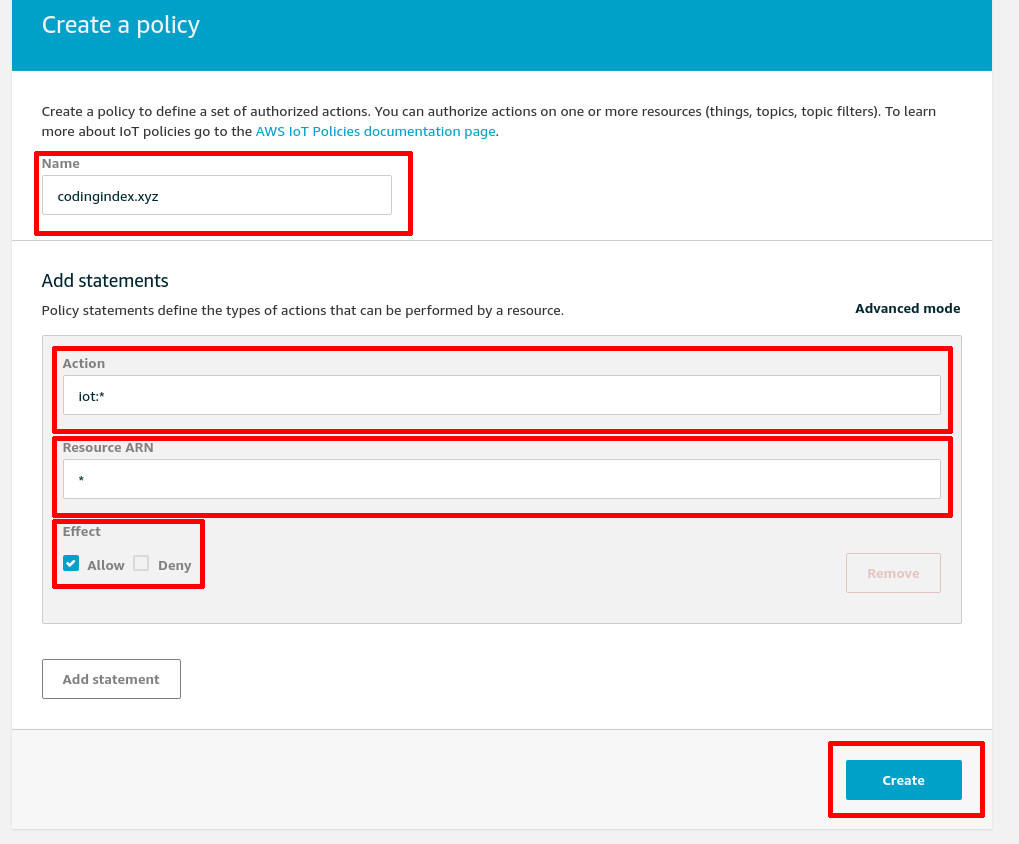
Values for the wizard | Source: Me
- On the sidebar, goto Manage > Things, and click on “Register a thing” or “Create” depending on which one is present.
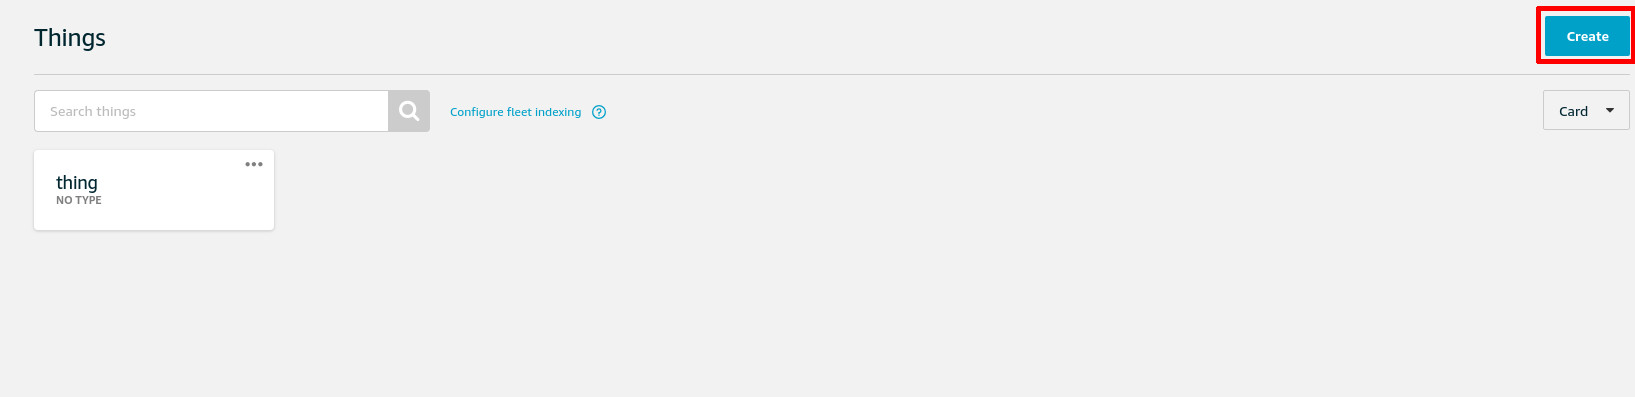
Click on Create | Source: Me
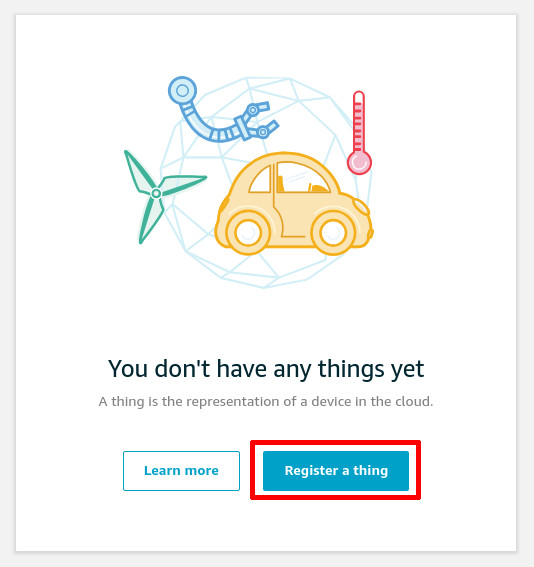
Or click on Register a Thing | Source: Me
- Click on “Create a single thing”.
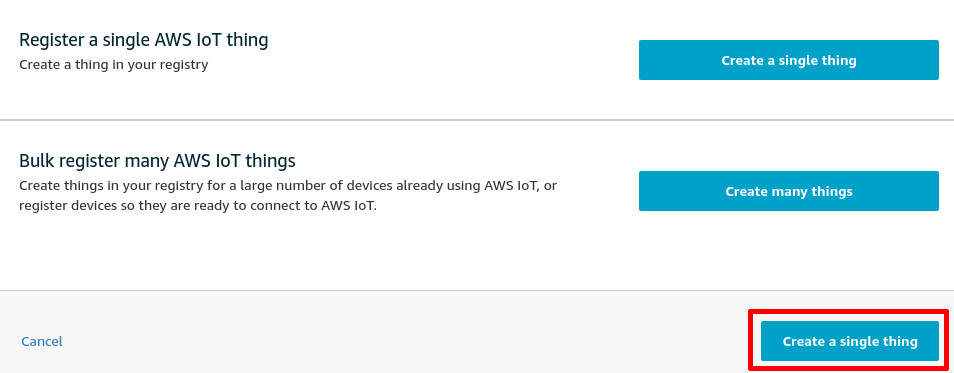
Create a single thing | Source: Me
- Name your thing whatever you want, and click Next at the bottom of the page.
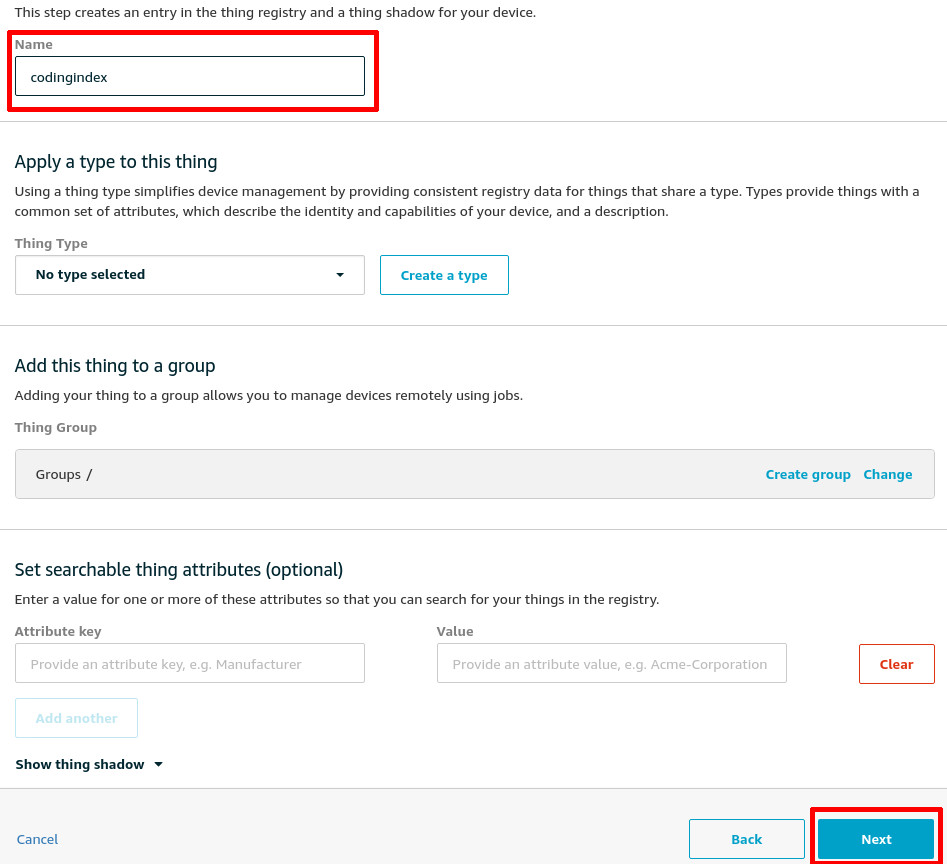
Name your thing, and press create | Source: Me
- Click on One-click certificate creation (recommended).
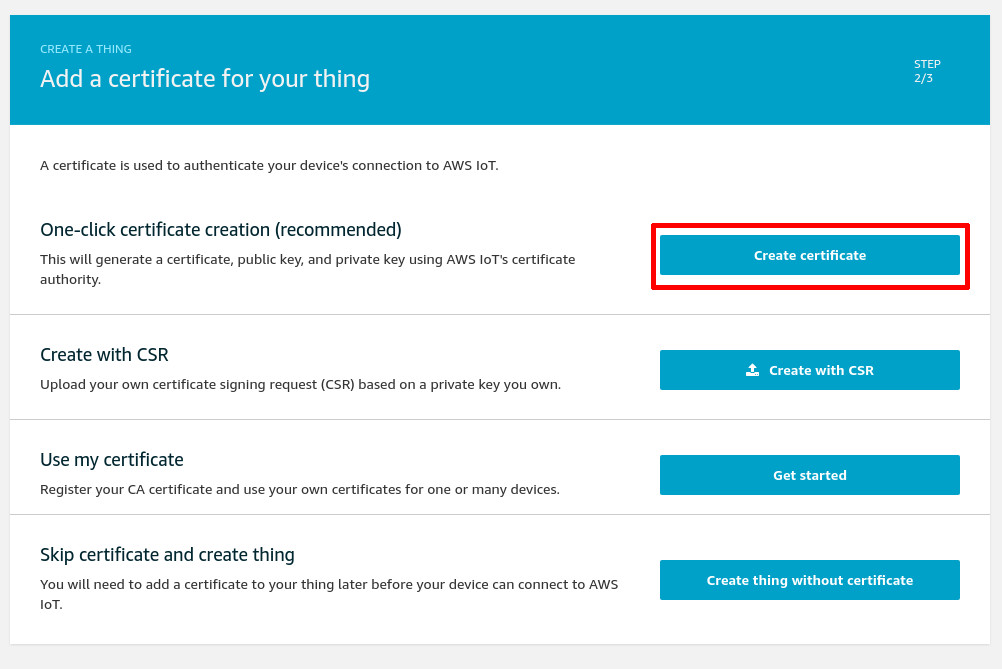
Certificate Creation | Source: Me
- After a while, the wizard should generate a certificate. Download the certificate, and the private key. Also, get the root CA, here is a direct link to it. Make sure to activate the certificate before clicking Attach a policy.
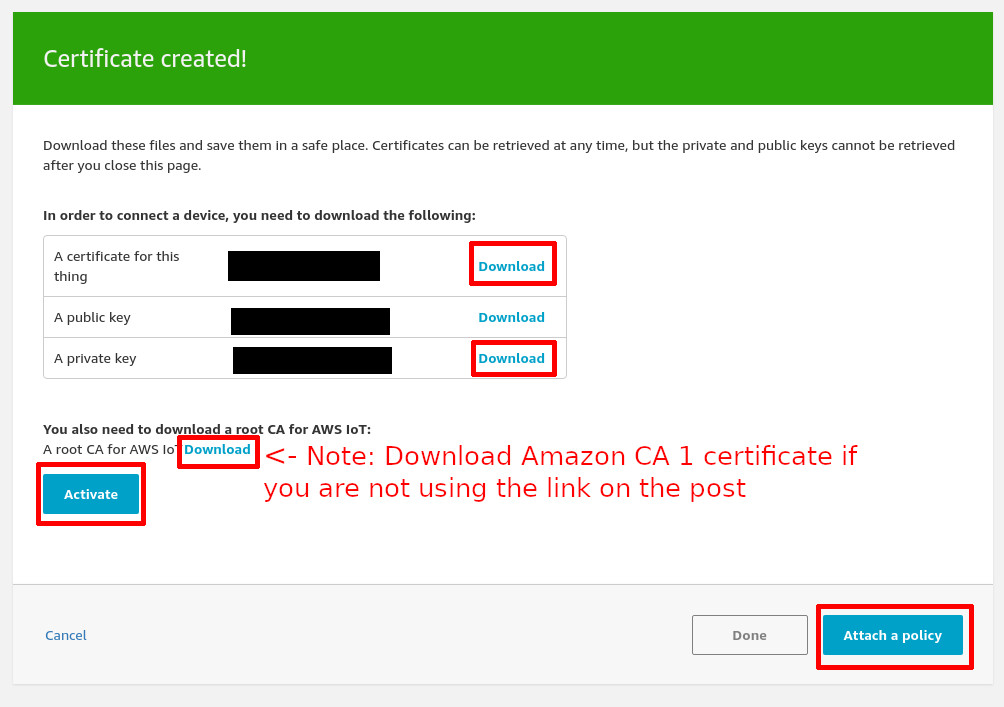
Download the cert, private key, CA cert, and activate before continuing. | Source: Me
- Find your policy in the search box, and select it. Then, click Register Thing.

Register thing | Source: Me
- Click into the thing you have created.
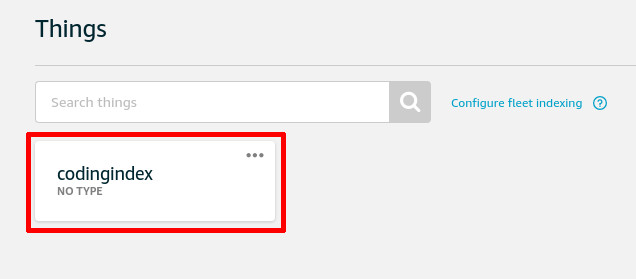
Click into the thing you created | Source: Me
- On the sidebar, click on Interact.
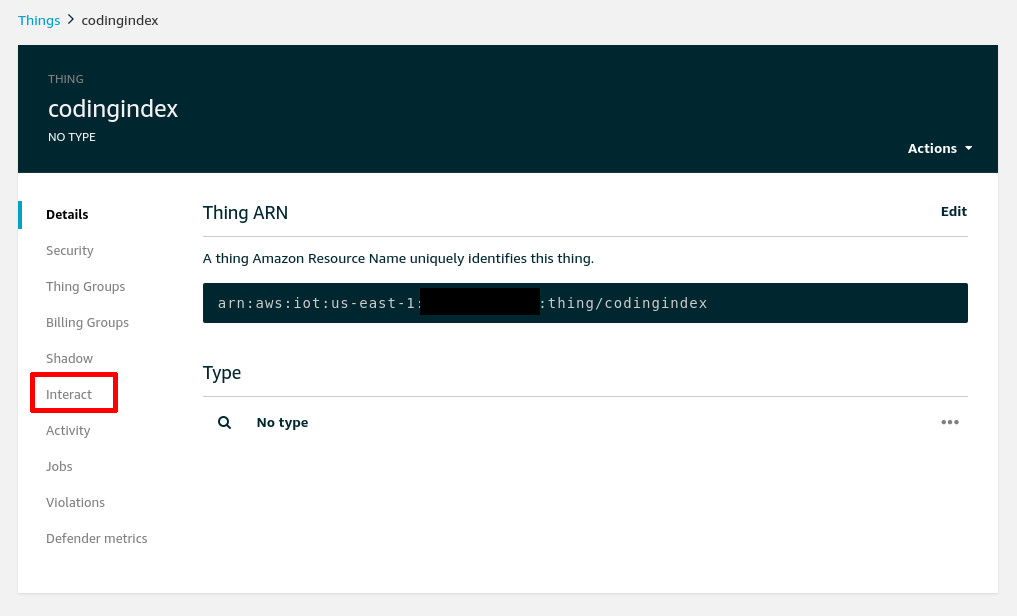
Caption
- Note down the HTTP Endpoint (both MQTT and HTTP share the same endpoint).

Note down the endpoint | Source: Me
- Click the grey back arrow in the page and click on Test in the sidebar. You should see the MQTT Client as shown below. Keep this window open, and proceed to Step Dos.
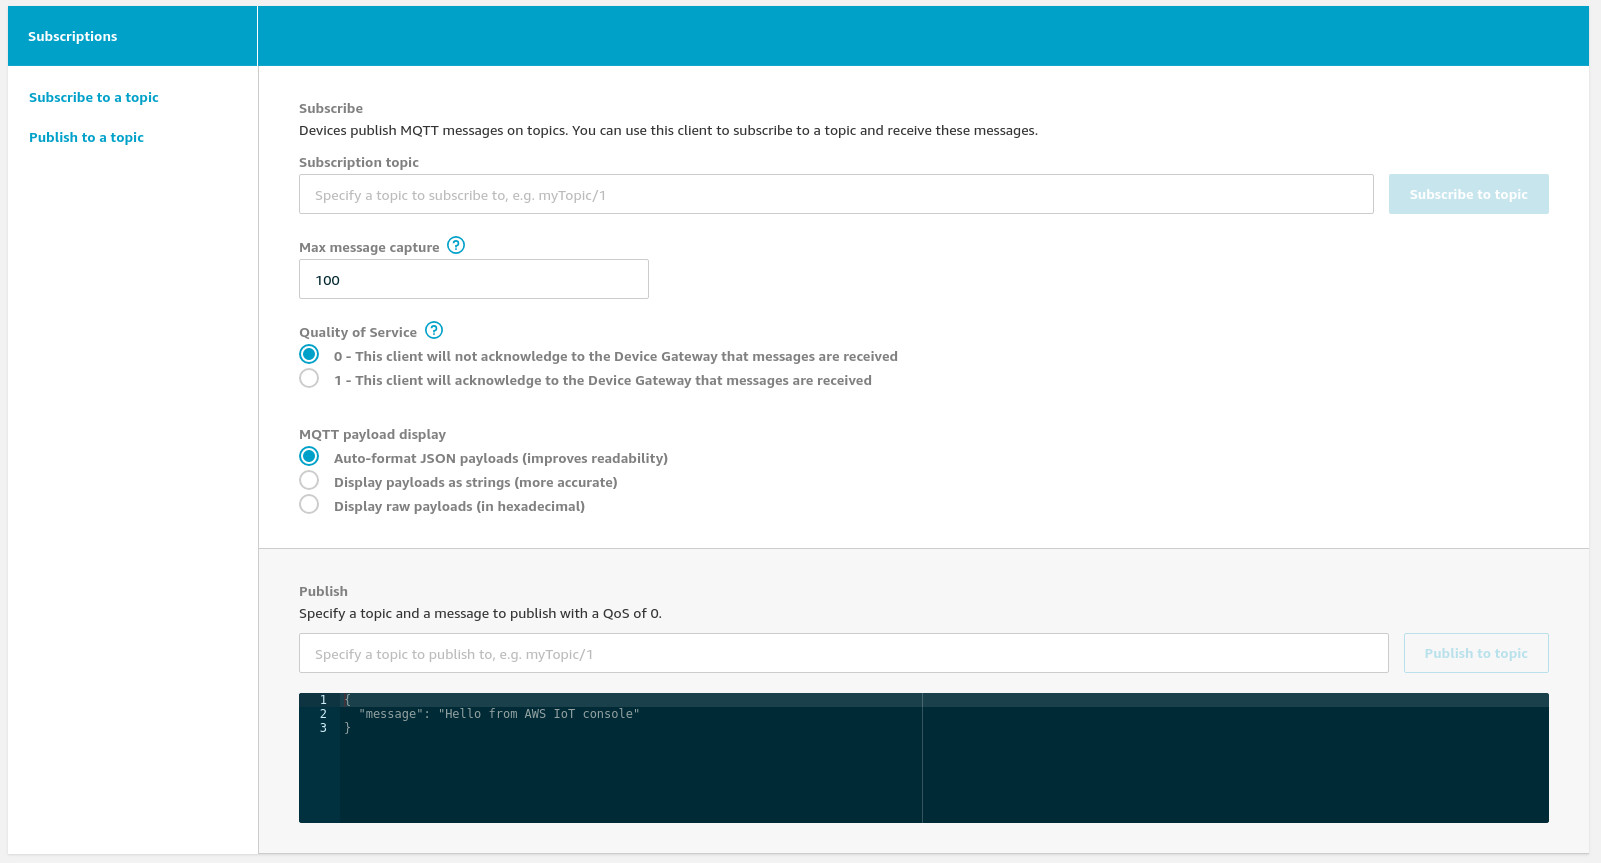
MQTT Client on AWS IoT Console | Source: Me
Step Dos
- Open the Arduino IDE / Switch to the Arduino IDE.
- Completely replace all the code in the IDE with code from this gist.
- Fill in the configuration options by editing the content within the double quotes ("):
-
SSID: The SSID of the access point to connect to. -
Password: The password of the access point to connect to. -
aws_iot_hostname: The hostname you noted down during Step Uno. -
aws_iot_sub_topic: The topic this device should subscribe to. For this tutorial, we’ll usetopic/hello, however, when following the tutorial with your friends, please have unique topics. -
aws_iot_pub_topic: The topic this device should publish to. For this tutorial, it’ll beanother/topic/hello, however, when following the tutorial with your friends, please have unique topics. -
ca_certificate: Copy the contents of the CA certificate you downloaded (file should beAmazonRootCA1.pem) using any text editor like Notepad or Vim, and paste it into the textbox located below this list. Click onMake into C++ String, and copy the contents of the textbox into the configuration option. -
iot_certificate: Copy the contents of the certificate you downloaded (file should be*-certificate.pem.crt) using any text editor like Notepad or Vim, and paste it into the textbox located below this list. Click onMake into C++ String, and copy the contents of the textbox into the configuration option. -
iot_privatekey: Copy the contents of the private key you downloaded (file should be*-private.pem.key) using any text editor like Notepad or Vim, and paste it into the textbox located below this list. Click onMake into C++ String, and copy the contents of the textbox into the configuration option.
-
- Plug in your ESP32 now.
- Select the port by going into Tools > Port > COMX or /dev/ttyUSBX, where X is the port to your ESP32.
- Click on Upload.
- [Optional] Launch the serial console to see debugging infomration.
Step Tres
- Go back to the window highlighted in the last step of Step Uno.
- For this tutorial, fill in
another/topic/echoin the Subscription topic textbox, and click onSubscribe to topic.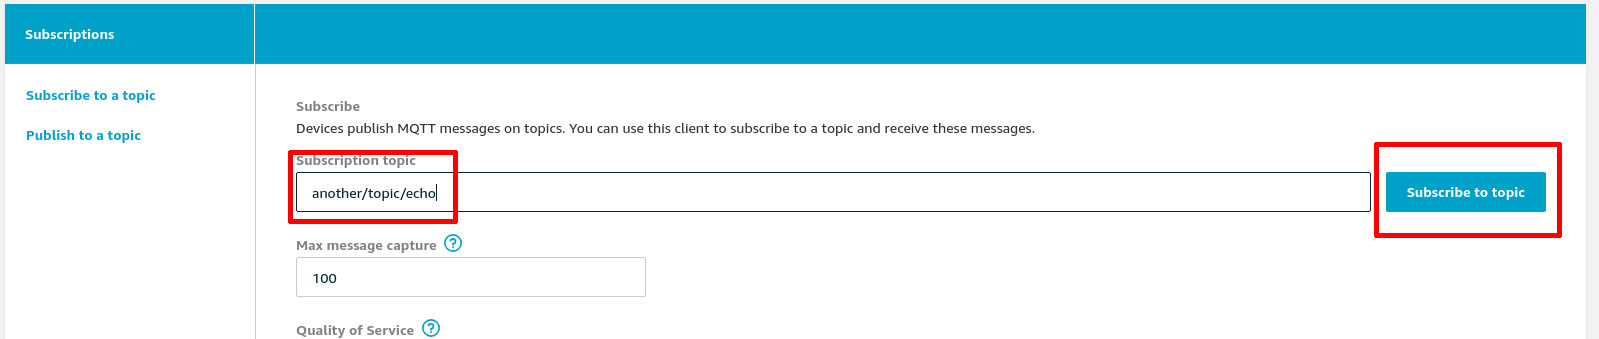
Subscribe to the topic | Source: Me
- For this tutorial, fill in
topic/helloin the Publish textbox, and click onPublish to topic.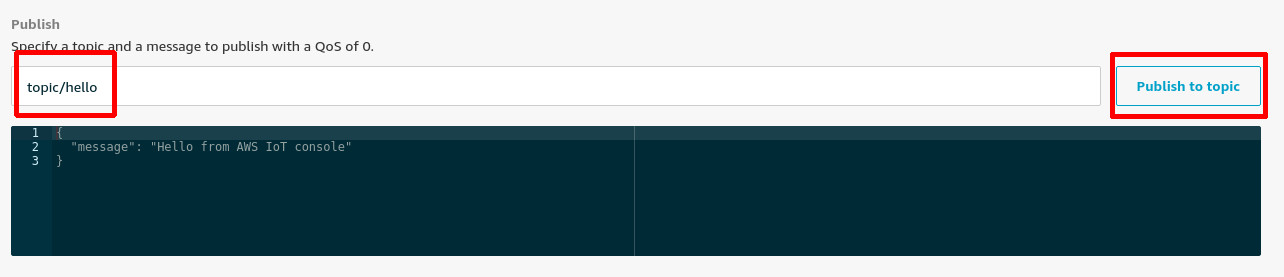
Publish to the topic | Source: Me
- If you have done everything correctly so far, you should see a new message popup below the publish block, which is echoed from the device. If you have have your serial console up, you can also see that the message has reached your ESP32.

An echo from the ESP32 on AWS IoT | Source: Me

Serial Console | Source: Me
- Clear the text field that contains the JSON, and try publishing either 1 or 0, and observe the ESP32 closely per published message.
Code explanation
The code contains the absolute (mostly) minimal code required to perform MQTT Pub/Sub with AWS IoT MQTT endpoints. Other than the MQTT client verifying the server’s identity, AWS also requires that all clients be authenticated with client certificates. Hence, the following lines:
client.setCACert(ca_certificate);
client.setCertificate(iot_certificate);
client.setPrivateKey(iot_privatekey);
are responsible for setting the required certificates for communication.
Publishing is done like so:
mqtt.publish(aws_iot_pub_topic, aws_iot_pub_message);
And subscribing is done like so:
mqtt.subscribe(aws_iot_sub_topic); //subscribe to the topic
Do note that for subscribing, you must provide a callback function with the signature of void callback(const char* topic, byte* payload, unsigned int length). This callback will be called by the PubSubClient library whenever there is a new message from the subscribed topics.
MQTT typically uses port 1883 and 8883. AWS IoT only uses port 8883, because it uses MQTT over SSL (MQTTS), hence the line:
mqtt.setServer(aws_iot_hostname, 8883);
Hope you enjoyed the tutorial. In part two of this two-parter tutorial, we will be adding a policy that will pipe whatever our ESP32 publishes to AWS IoT into DynamoDB. Until then,
Happy Coding,
CodingIndex