
A (human) index that likes to code
Also drinks way too much coffee ![]()
ZeroTier OpenVPN NAT - Part 3
Published Feb 14, 2021 13:28

Duo Architecture
Solution Duo was designed with the following goals:
- Guaranteed connectivity
- High Federation
Step 0: Pre-requisites
You will need an Oracle Cloud account. An account will remain always-free until it is explicitly upgraded; so don’t worry too much about being charged.
Step 1: Creating cloud resources (Skippable)
It is not an explicit requirement to create any of the resources here; however, it is good practice (at least in AWS) to house all the resources in their proper groups.
For this step we will be creating/modifying the following things:
- Virtual Cloud Network
- Subnet
- Internet Gateway
- Network Security Group
- Security List
- Route Table
Navigate to the Virtual Cloud Networks page, and click on “Create VCN”.
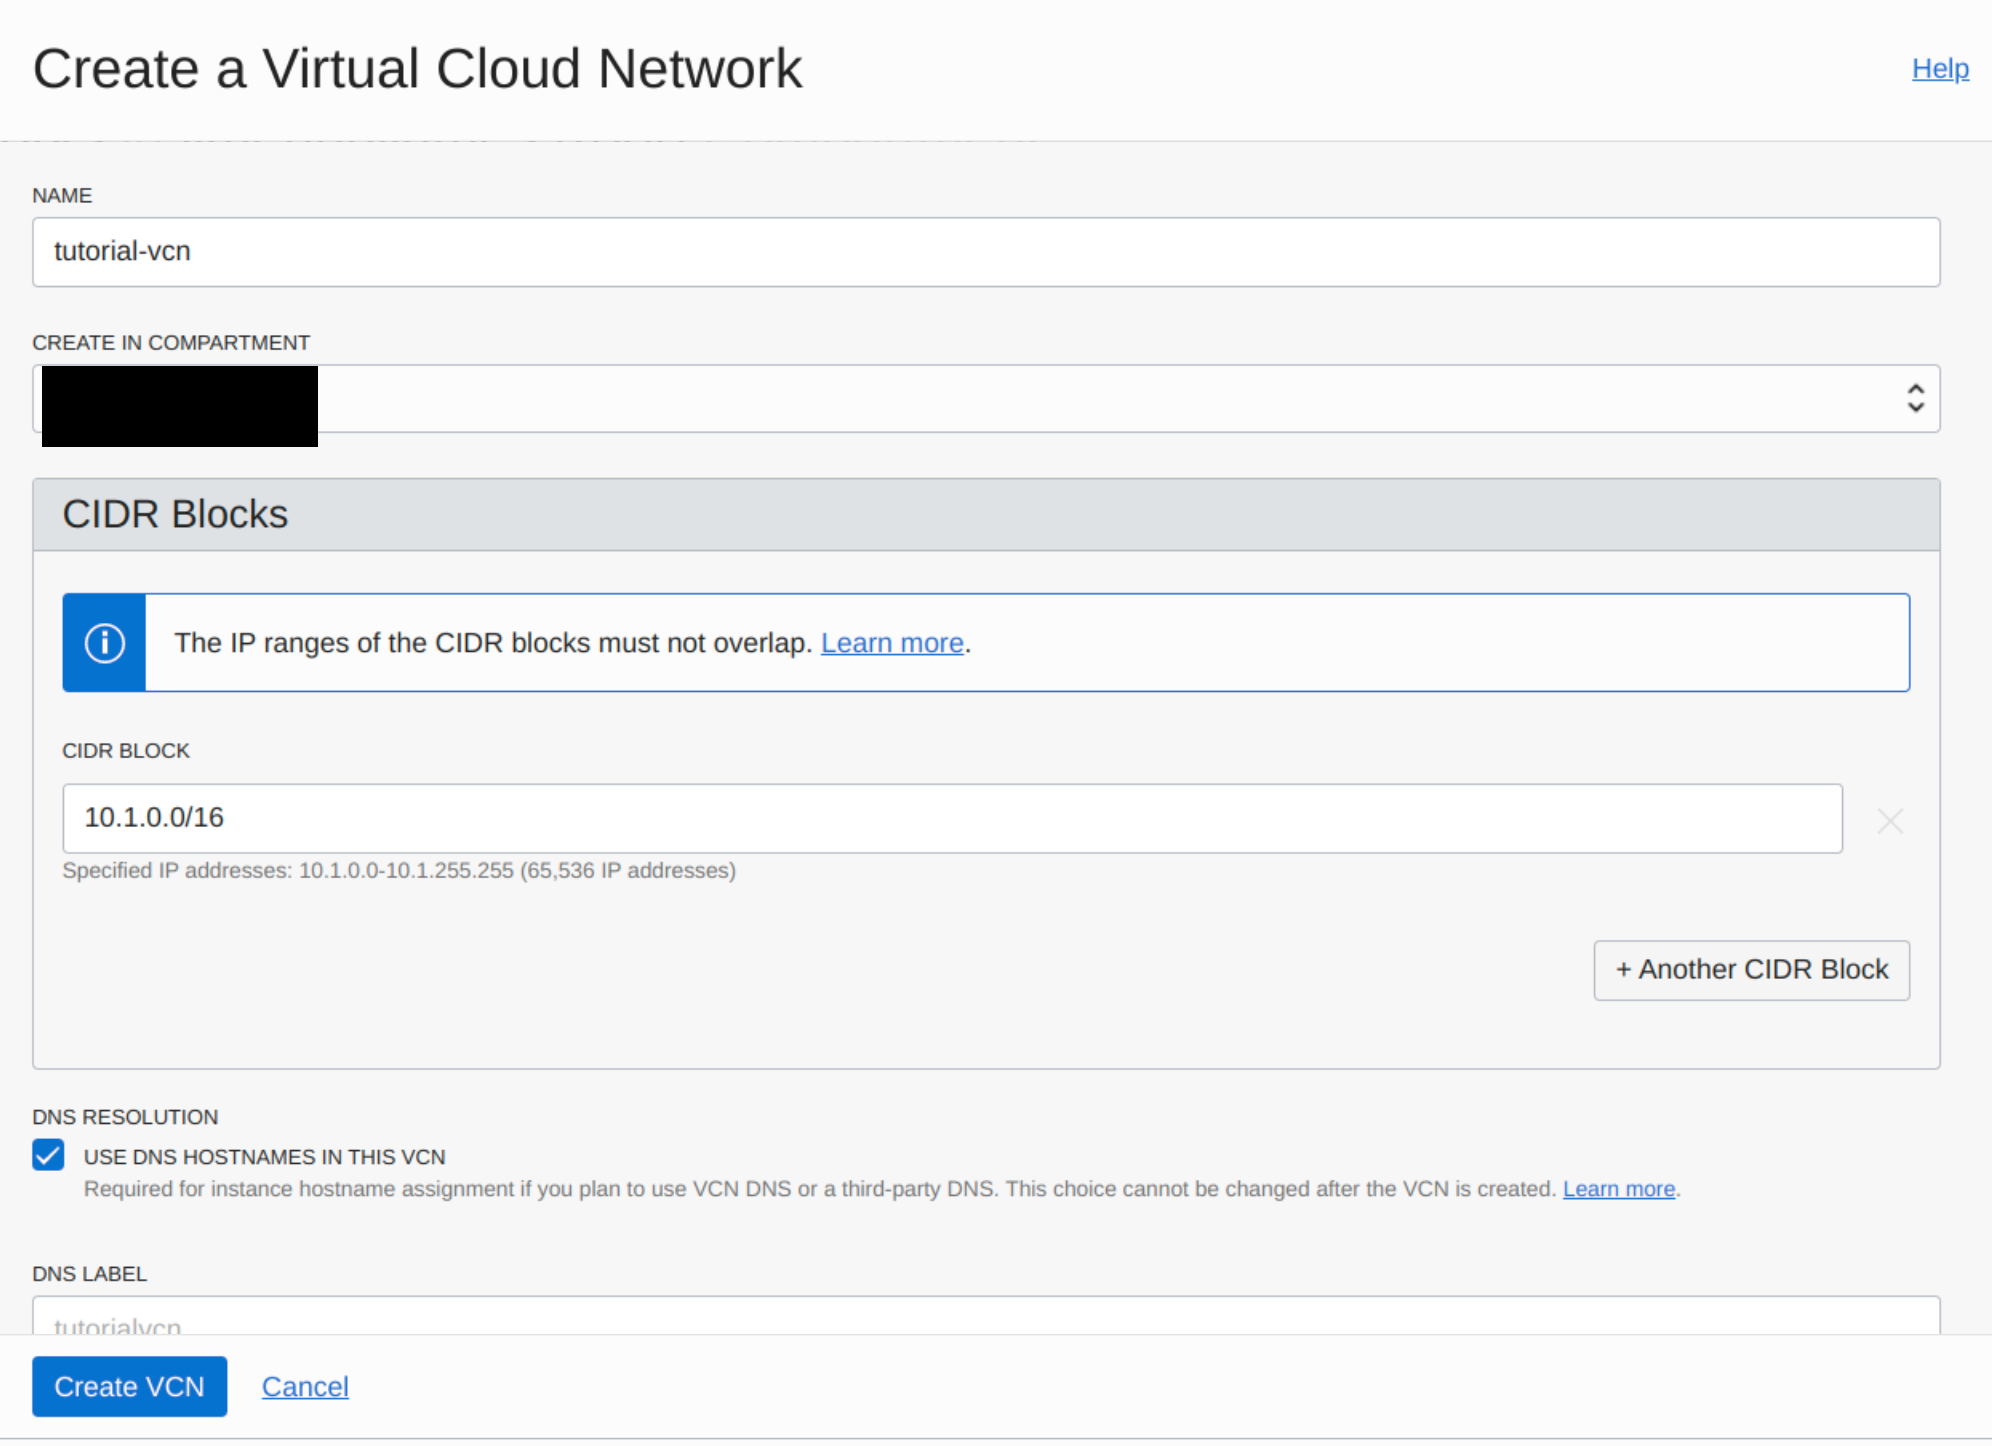
Creating VCN | Source: Me
Name the VCN whatever you like; it does not matter. After you are done, click on “Create VCN”.
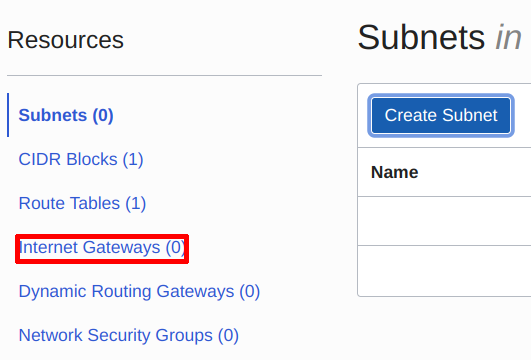
Oracle Cloud will redirect you to the page detailing the VCN. From the sidebar, click on “Internet Gateways”:
Navigate to Route Tables | Source: Me
Create an Internet Gateway, and name it anything you want.
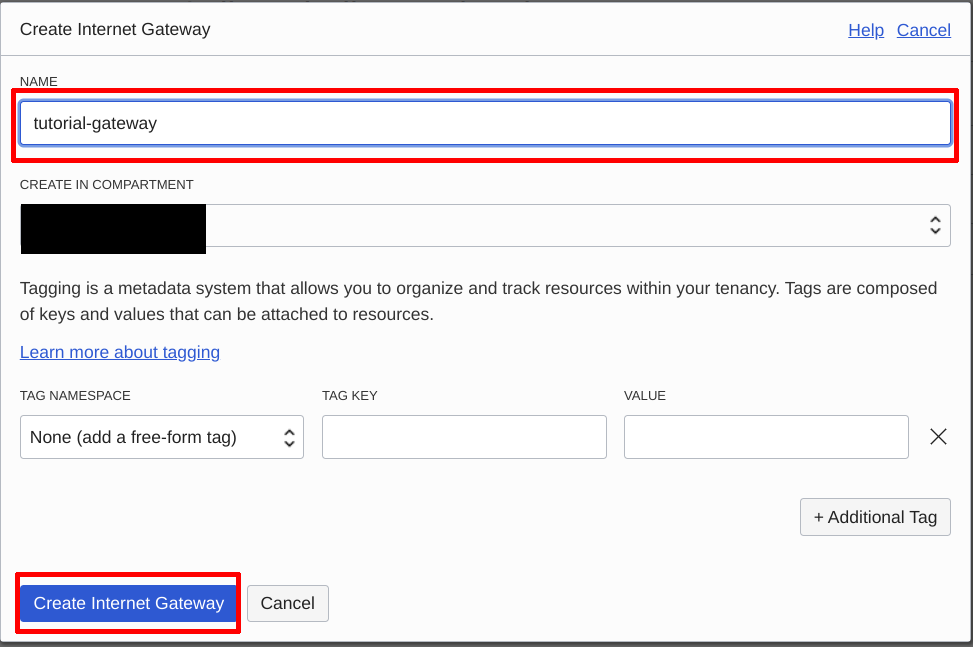
Name your internet gateway | Source: Me
From the sidebar, click on “Route Tables”:
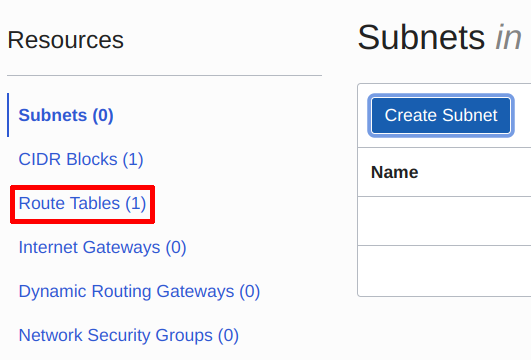
Navigate to Route Tables | Source: Me
Click on “Create Route Table”:

Create a Route Table | Source: Me
Name the Route Table anything you want, and then click on “Create”:
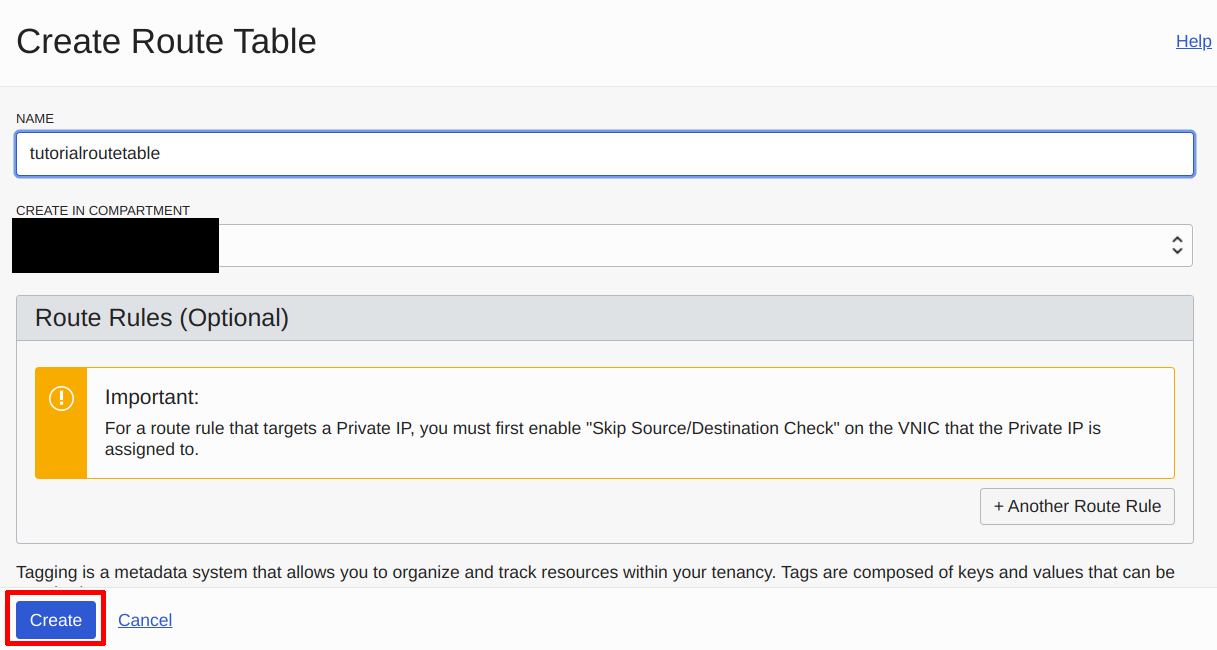
Name the Route Table | Source: Me
After the page redirects, click into the Route Table you just created:
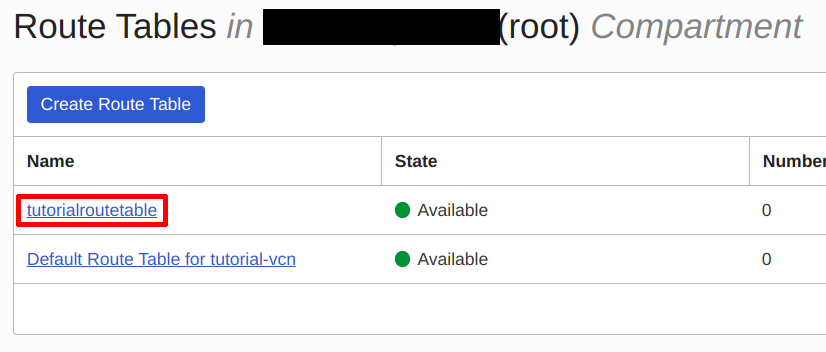
Click the Route Table | Source: Me
Then, click on “Add Route Rules”:
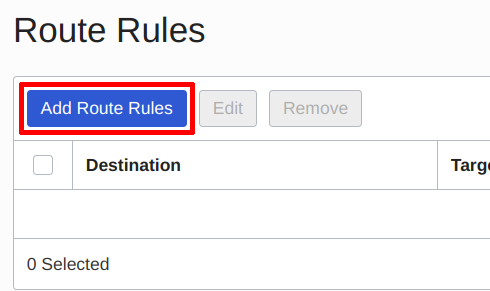
Add Route Rules button | Source: Me
In the dialog that appears, choose “Internet Gateway” as the Target Type, 0.0.0.0/0 as the Destination CIDR Block, and set Target Internet Gateway to the Internet Gateway you just created. After that, click on “Add Route Rules”.
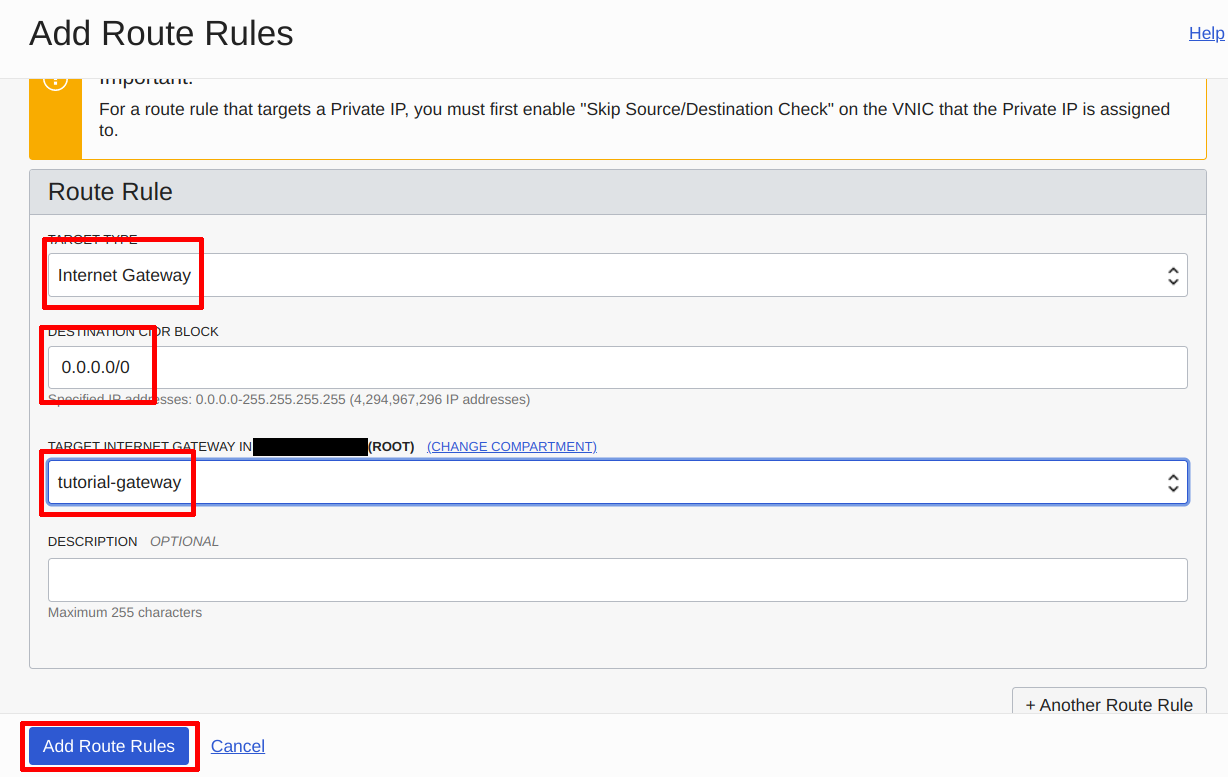
Configure the Route Table | Source: Me
Navigate back to the VCN page by clicking on the VCN name on the breadcrumbs bar:
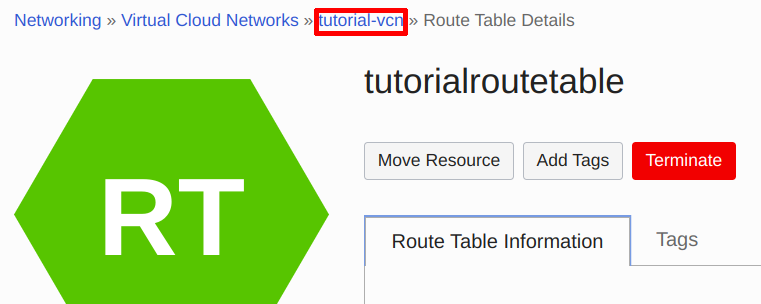
Navigate back to the VCN page | Source: Me
From here, click on “Create Subnet”:
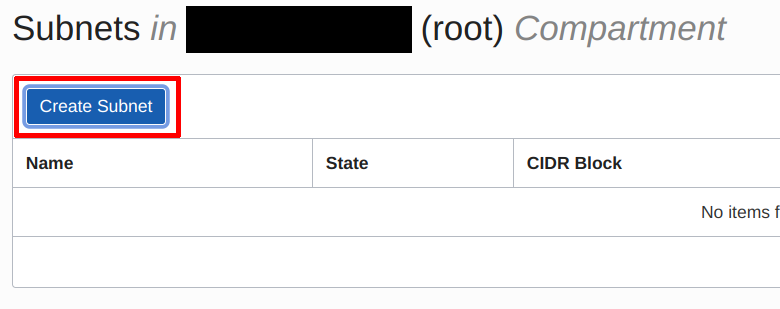
Creating Subnet | Source: Me
Then, configure the subnet:
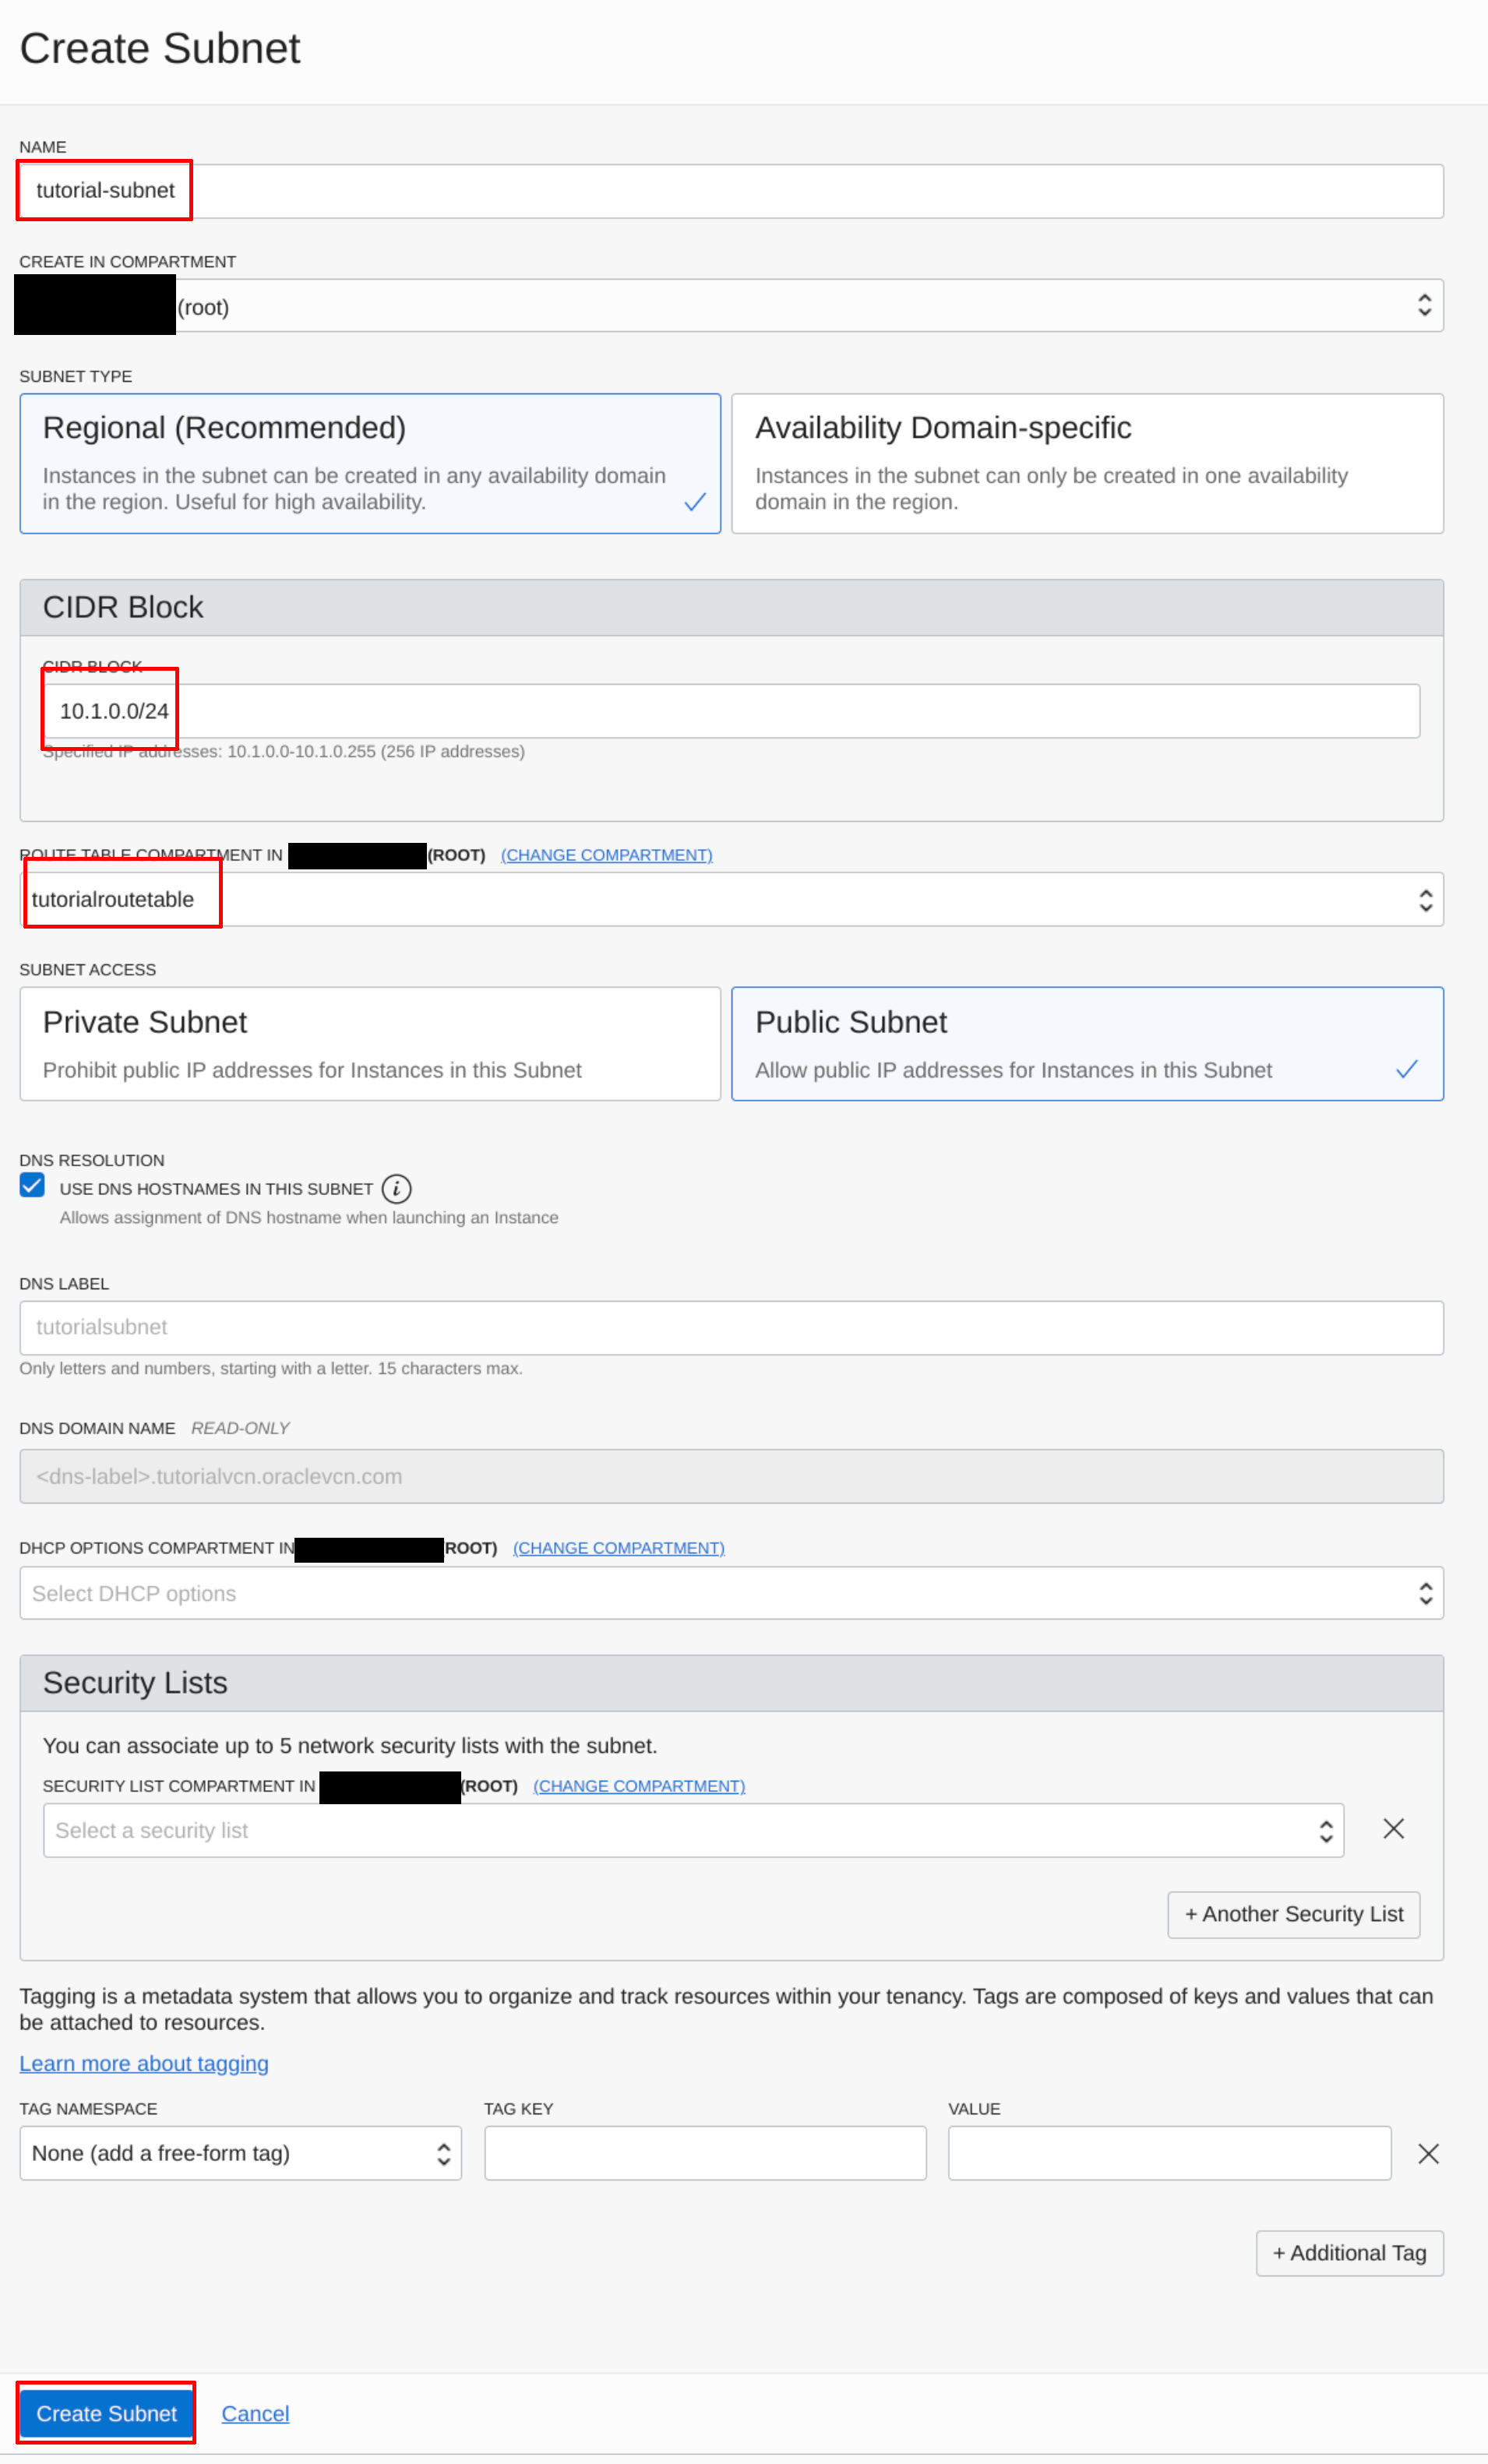
Configuring the Subnet | Source: Me
After being redirected back to the subnet page, click on “Security List” on the sidebar. You do not need to wait for the Subnet to finish provisioning:
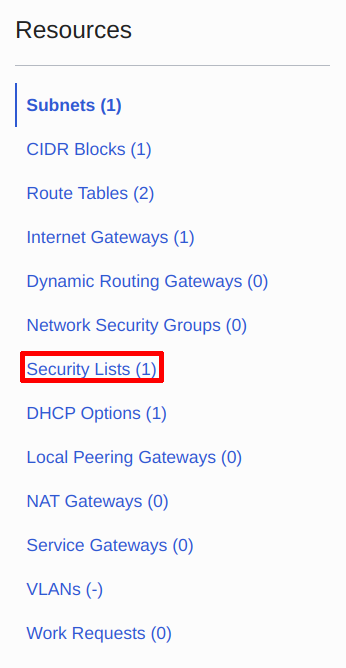
Navigate to Security List | Source: Me
Click on create “Create Security List”:

Create a security list | Source: Me
Fill in the details for the Security List. Take care to include rules for port 22 and port 443 (OpenVPN TCP) for TCP, and port 1194 (OpenVPN UDP) for UDP; you can click on “Add Ingress Rule” or “Add Egress Rule” to create new rules for the Security List accordingly. Keep the “Stateless” box unchecked, so that ZeroTier can smoothly perform UDP hole punching.
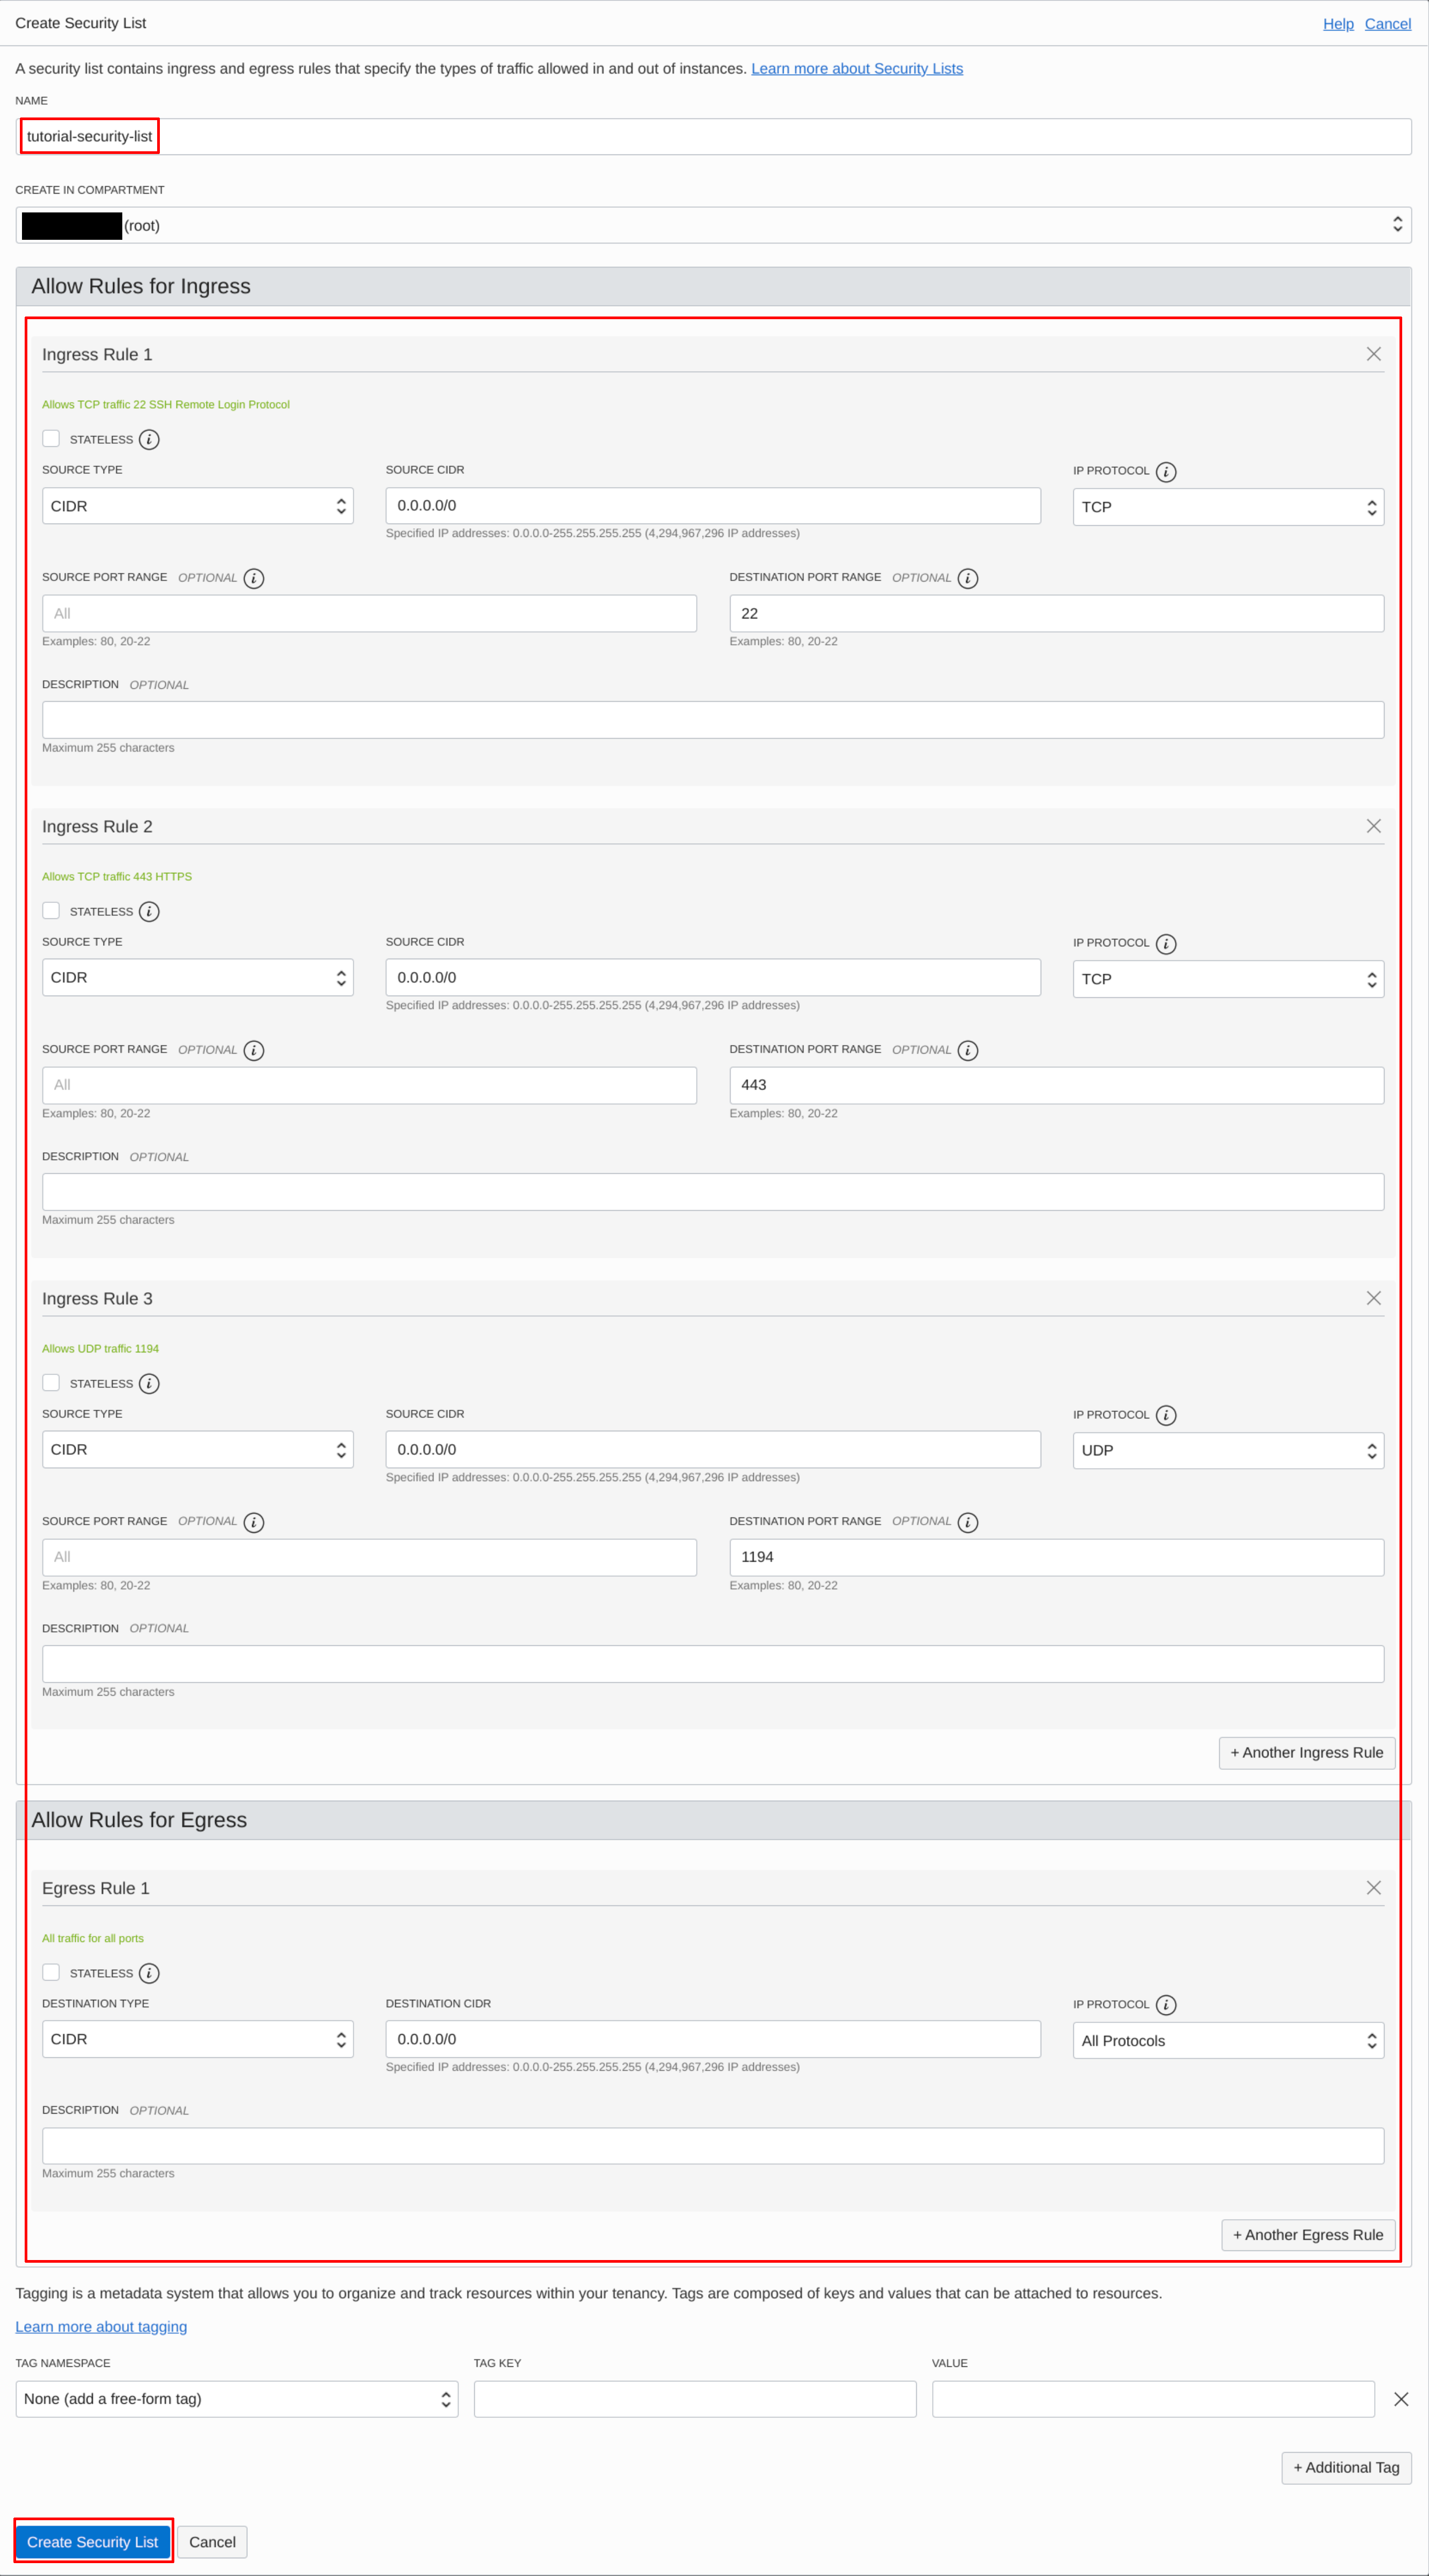
Configure the security list | Source: Me
After being redirected back to the Security List page, click on “Network Security Groups” on the sidebar.
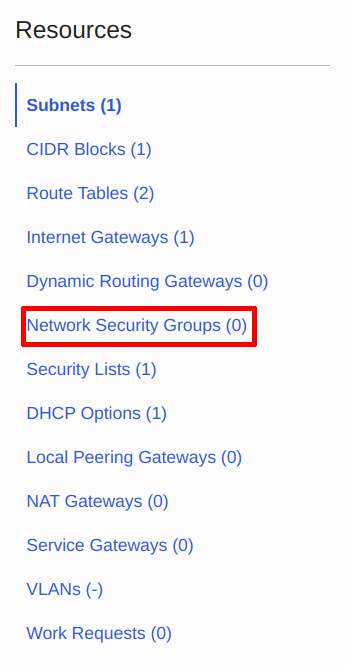
Navigate to Network Security Groups | Source: Me
Click on “Create Network Security Group”.
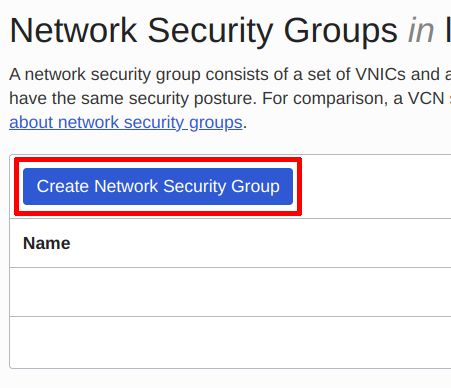
Create Network Security Group | Source: Me
Name the Network Security Group whatever you want, then click Next:
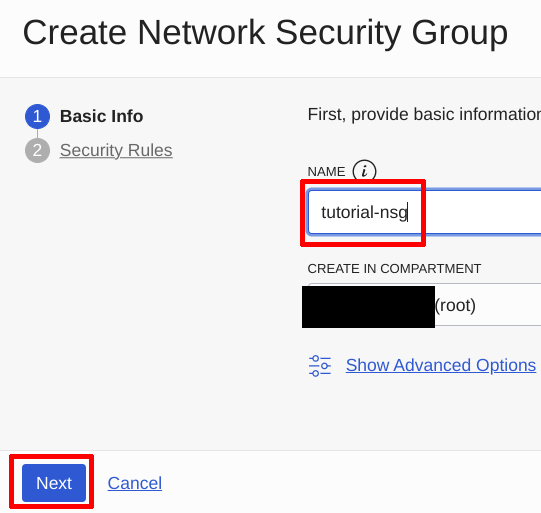
Name the Network Security Group | Source: Me
Add the same rules as you did for the Security List:
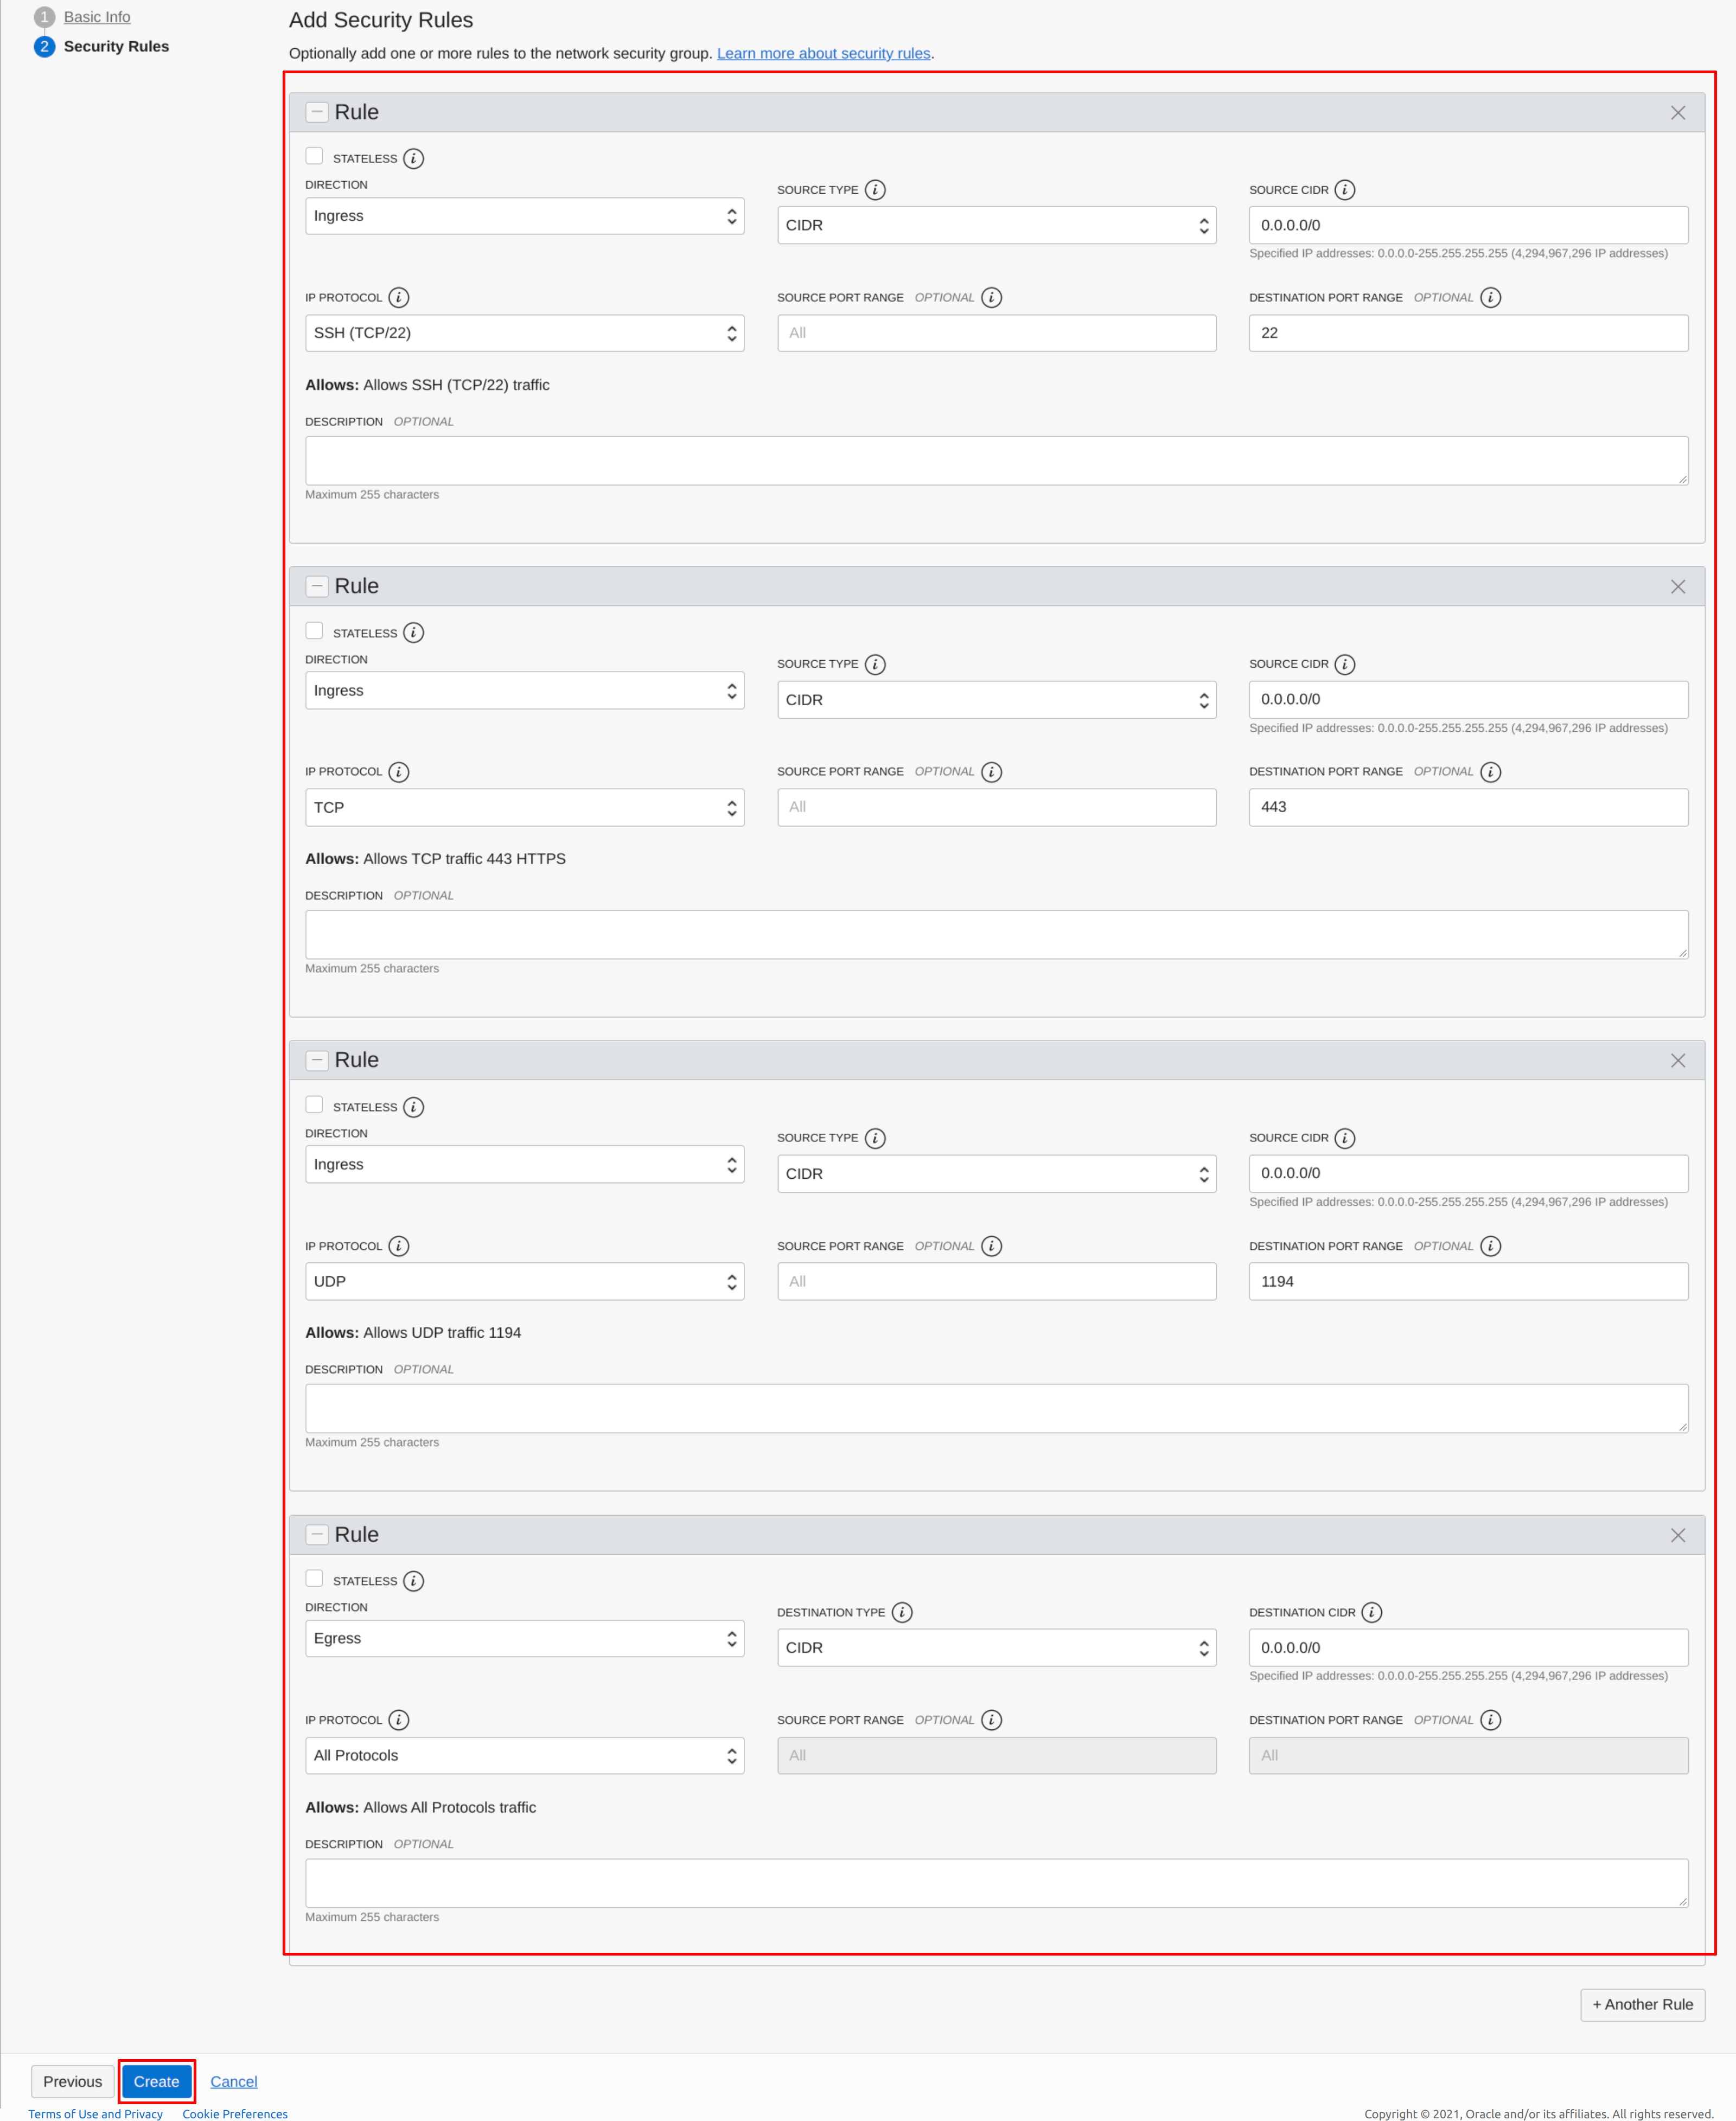
Configure the Network Security Group | Source: Me
Go back to the subnet page:
Navigate back to the VCN page | Source: Me

Navigate to the subnet page | Source: Me
Click into the public subnet created earlier:
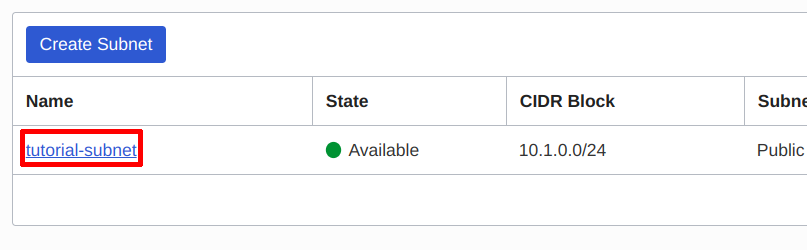
Click into the subnet you created earlier | Source: Me
Click on add security list:
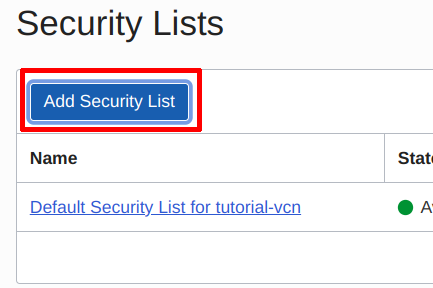
Click on Add Security List | Source: Me
Add the security list created earlier:
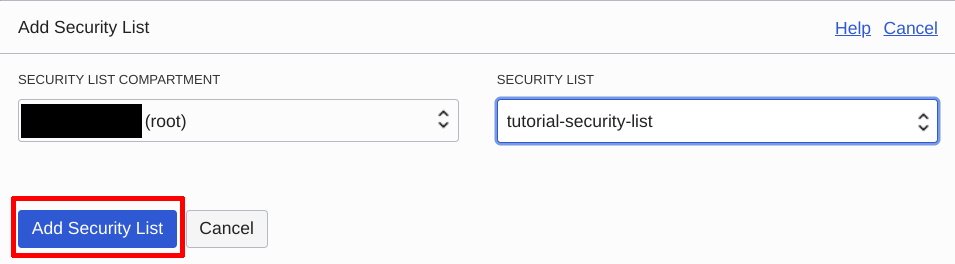
Add the security list created earlier | Source: Me
Delete the default security list from the subnet:
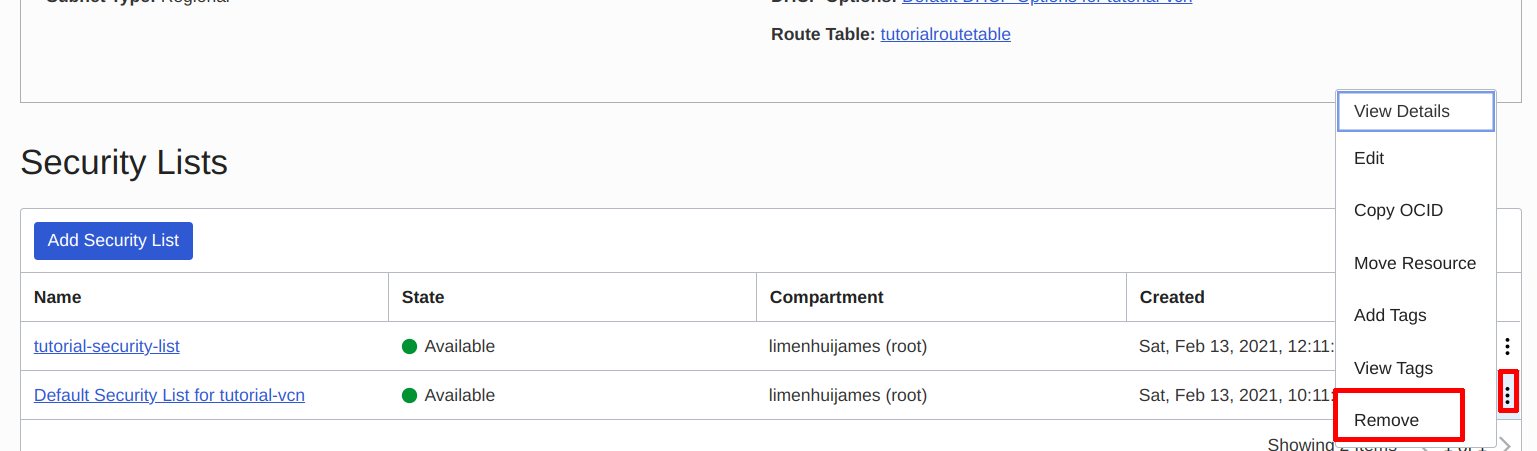
Delete the default security list | Source: Me
Step 2: Create a VM
Go to the instances page, and click on “Create Instance”:
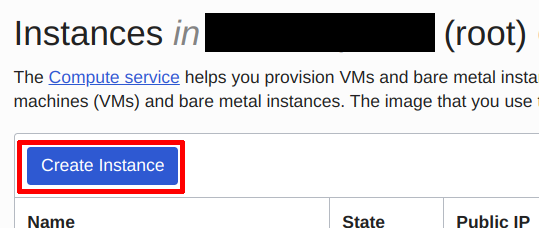
Create an instance | Source: Me
You can leave the instance name as it’s default, or name it whatever you like. Click on the box containing the Container Image, and choose the “Canonical Ubuntu 20.04 Minimal” image. If you went through all the steps in Step 1, then under “Configure networking”, check “Use network security group to control traffic”; select the VCN, Subnet and Network Security Group created in Step 1. Under “Public IP Address”, select “Assign a public IPv4 address”.
Remember to click on “Save Private Key” so that you can connect to the instance later on. Then, click the “Create” button.

Create a VM instance | Source: Me
Optional
If you want some redundancy that a Cloud VM instance can have, you can:
- Create and attach a block volume (free tier: 100GB); put all your configuration files there.
- You may need to stop the
zerotier-oneservice torm -rf /var/lib/zerotier-one, so that you can runln -s /var/lib/zerotier-one /mnt/blockvolume/zerotierto more effectively transfer ZeroTier identities from one instance to another.
- You may need to stop the
- Create an image once you are done setting up the instance; then, create an instance pool that uses the created image.
- Reserve a public IP so that you can reattach it to a new instance.
- Use Dynamic DNS for your instance, or use Oracle Cloud’s load balancer; take note that Oracle Cloud’s load balancer is a paid service.
This guide doesn’t cover these, because I am too lazy to explain them, out of scope, and I’m running out of time ![]() , but they are simple enough that an afternoon should suffice to research how to accomplish them.
, but they are simple enough that an afternoon should suffice to research how to accomplish them.
Step 3: Install packages on VM
For this step, we must install a text editor (vim, nano, etc), ZeroTier, easy-rsa and OpenVPN. Additionally it is recommended that you install UFW, although Step 1 should have amortized your instance enough.
SSH to the instance with the downloaded key, then run the following command:
curl -s https://install.zerotier.com | sudo bash
sudo apt-get -y install openvpn vim easy-rsa ufw
sudo systemctl enable zerotier-one && sudo systemctl start zerotier-one
sudo zerotier-cli join <network ID>
Ensure on ZeroTier Central or equivalent that your VM instance has joined the network. Do note down the ZeroTier tunnel device name:
ip link | grep "zt"
Before you forget, allow SSH connections and enable UFW:
sudo ufw allow 22/tcp
sudo ufw enable
Oracle Cloud adds their own rules to iptables, which causes some routing problems later on down the road. If you plan on hosting other services, do take note of Oracle Cloud’s rules (which by default only allows connections from TCP port 22):
sudo iptables -vL
This guide will add entries into iptables such that they are not blocked by Oracle Cloud’s default rules; you can refer to them to add rules for your own services.
Step 4: Create & Configure OpenVPN server
This step is adopted from DigitalOcean’s guide on how to setup an OpenVPN server; that guide uses Ubuntu 16.04 with easy-rsa 2, while this guide uses Ubuntu 20.04 with easy-rsa 3. There are also easy setup scripts online, although you should exercise caution when running scripts downloaded from the internet.
Before we can even configure the OpenVPN server, we must become a Certificate Authority and issue certificates for both the server and client. This allows clients authenticate the server, and vice-versa.
Find a suitable working folder, and create a folder to store CA related files:
make-cadir openvpn-ca
Then, append the following lines into the openvpn-ca/vars file:
export KEY_COUNTRY="US"
export KEY_EMAIL="donotemail@exdee.exdee"
export KEY_CITY="Somewhere"
export KEY_PROVINCE="There"
export KEY_ORG="CodingIndex"
export KEY_OU="ADMIN"
export KEY_NAME="server"
Change the values of all the variables to whatever you want; just try not to change KEY_NAME, unless you have to - it is easier to follow the guide if you name your key “server”.
Next, you will want to change your working directory to openvpn-ca, so that you can run the easyrsa executable with the following subcommands:
cd openvpn-ca
./easyrsa init-pki
./easyrsa build-ca
./easyrsa build-server-full server nopass
./easyrsa gen-dh
mkdir keys && openvpn --genkey --secret keys/ta.key
Easy-rsa may prompt you for additional information.
Run
easyrsa --pki-dir=<insert directory here>to change where the PKIs are stored, which by default is${PWD}/pki.
You should then create as many client certificates as the devices you plan to connect to this server. But it is not strictly necessary, as one certificate can be used for multiple devices. Here is how to create a single client certificate:
./easyrsa build-client-full client1 nopass
Copy the appropriate certificates to the /etc/openvpn folder:
sudo cp keys/ta.key ${PWD}/pki/private/server.key ${PWD}/pki/issued/server.crt ${PWD}/pki/dh.pem /etc/openvpn
Next, download the sample server configuration file from the OpenVPN’s Git repository (if you are on an Ubuntu minimal image, you should not have this on your system because it has been minimized):
cd /etc/openvpn
sudo wget https://raw.githubusercontent.com/OpenVPN/openvpn/master/sample/sample-config-files/server.conf
Edit the server configuration file; for this part, we will configure a TCP OpenVPN server listening on port 443, but the method to configure are the same for the UDP OpenVPN server listening on port 1194 if you decide to host two OpenVPN servers. Modify the following lines by searching for them in your favourite editor:
/etc/openvpn/server.conf:
port 443
proto tcp
user nobody
group nogroup
cipher AES-256-CBC
auth SHA256
push "redirect-gateway def1 bypass-dhcp"
push "dhcp-option DNS 208.67.222.222"
push "dhcp-option DNS 208.67.220.220"
dh dh.pem

# these line does not exist by default
auth SHA256
Try starting the OpenVPN server:
sudo systemctl start openvpn@server
sudo systemctl status openvpn@server
If the server successfully initializes, then enable the server, and note down the tunnel device used for the connection:
sudo systemctl enable openvpn@server
ip link | grep "tun"
More than likely, the result should show tun0.
Download your VPN provider’s OpenVPN configuration file, and copy them into /etc/openvpn. Afterwards, create a service file in /etc/systemd/system:
/etc/systemd/system/vpnprovider.service:
[Unit]
Description=Binds OpenVPN server tunnel to OpenVPN client tunnel

[Service]
Type=simple
ExecStart=openvpn --cd /etc/openvpn --config <client config file here> --route-noexec --route-up /etc/openvpn/client-up.sh --route-pre-down /etc/openvpn/client-down.sh

[Install]
WantedBy=multi-user.target
Then, create the files /etc/openvpn/client-up.sh and /etc/openvpn/client-down.sh to manually route:
- All connections to 0.0.0.0/0 to the VPN provider;
- All connections to ZeroTier local address (e.g. 172.25.0.0/16) to ZeroTier.
/etc/openvpn/client-up.sh:
#!/bin/bash

SRC_DEVICE="tun0"
ZT_DEVICE="ztly52mmwy"
ZT_CIDR="172.25.0.0/16"

set -e

sysctl -w net.ipv4.ip_forward=1

touch /etc/iproute2/rt_tables.d/ovpn2ovpn.conf
echo "42070 ovpn2ovpn" > /etc/iproute2/rt_tables.d/ovpn2ovpn.conf

ip rule add from 10.8.0.0/24 table ovpn2ovpn
ip route add default via ${route_vpn_gateway} dev ${dev} table ovpn2ovpn
ip route add ${ZT_CIDR} dev ${ZT_DEVICE} table ovpn2ovpn

iptables -I INPUT -i ${SRC_DEVICE} -d 0.0.0.0/0 -j ACCEPT
iptables -I INPUT -i ${ZT_DEVICE} -d ${ZT_CIDR} -j ACCEPT
iptables -I FORWARD -i ${SRC_DEVICE} -o ${dev} -d 0.0.0.0/0 -j ACCEPT
iptables -I FORWARD -i ${SRC_DEVICE} -o ${ZT_DEVICE} -d ${ZT_CIDR} -j ACCEPT
iptables -t nat -I POSTROUTING -o ${dev} -d 0.0.0.0/0 -j MASQUERADE
iptables -t nat -I POSTROUTING -o ${ZT_DEVICE} -d ${ZT_CIDR} -j MASQUERADE
/etc/openvpn/client-down.sh:
#!/bin/bash

SRC_DEVICE="tun0"
ZT_DEVICE="ztly52mmwy"
ZT_CIDR="172.25.0.0/16"

ip rule delete from 10.8.0.0/24 table ovpn2ovpn
ip route delete default via ${route_vpn_gateway} dev ${dev} table ovpn2ovpn
ip route delete ${ZT_CIDR} dev ${ZT_DEVICE} table ovpn2ovpn

rm -f /etc/iproute2/rt_tables.d/ovpn2ovpn.conf

iptables -D INPUT -i ${SRC_DEVICE} -d 0.0.0.0/0 -j ACCEPT
iptables -D INPUT -i ${ZT_DEVICE} -d ${ZT_CIDR} -j ACCEPT
iptables -D FORWARD -i ${SRC_DEVICE} -o ${dev} -d 0.0.0.0/0 -j ACCEPT
iptables -D FORWARD -i ${SRC_DEVICE} -o ${ZT_DEVICE} -d ${ZT_CIDR} -j ACCEPT
iptables -t nat -D POSTROUTING -o ${dev} -d 0.0.0.0/0 -j MASQUERADE
iptables -t nat -D POSTROUTING -o ${ZT_DEVICE} -d ${ZT_CIDR} -j MASQUERADE
10.8.0.0/24 is the CIDR used by default for /etc/openvpn/server.conf. Remember to flag the scripts as executable:
sudo chmod +x /etc/openvpn/client-up.sh /etc/openvpn/client-down.sh
Start the custom service:
sudo systemctl start vpnprovider
sudo systemctl status vpnprovider
If successfully started, enable the service:
sudo systemctl enable vpnprovider
Now that all the services are in place, allow them through the UFW:
ufw allow 9993/udp # for ZeroTier
ufw allow 443/tcp
ufw allow 1194/udp
In theory anyway. On Oracle Cloud VM instances, UFW rules are placed below a REJECT rule on the IPTables, like this:
Chain INPUT (policy DROP 0 packets, 0 bytes)
 pkts bytes target     prot opt in     out     source               destination
    4  1344 ACCEPT     all  --  tun0   any     anywhere             anywhere
 848K  472M ACCEPT     all  --  any    any     anywhere             anywhere             state RELATED,ESTABLISHED
    0     0 ACCEPT     icmp --  any    any     anywhere             anywhere
  688 59382 ACCEPT     all  --  lo     any     anywhere             anywhere
    0     0 ACCEPT     udp  --  any    any     anywhere             anywhere             udp spt:ntp
 1294 75128 ACCEPT     tcp  --  any    any     anywhere             anywhere             state NEW tcp dpt:ssh
10739 5199K REJECT     all  --  any    any     anywhere             anywhere             reject-with icmp-host-prohibited
    0     0 ufw-before-logging-input  all  --  any    any     anywhere             anywhere
    0     0 ufw-before-input  all  --  any    any     anywhere             anywhere
    0     0 ufw-after-input  all  --  any    any     anywhere             anywhere
    0     0 ufw-after-logging-input  all  --  any    any     anywhere             anywhere
    0     0 ufw-reject-input  all  --  any    any     anywhere             anywhere
    0     0 ufw-track-input  all  --  any    any     anywhere             anywhere
In other words, UFW becomes absolutely useless. As an interesting side note, trying to connect to a port other than TCP port 22 will yield ‘Destination Host Unreachable’ error messages thanks to IPTable rejecting connections with icmp-host-prohibited. There are two ways to circumvent this:
- Delete the REJECT rule;
- Add my own IPTable rules.
For this guide, I decided to just add my own iptable rules, since I don’t know the implications of deleting the REJECT rule:
/etc/iptables/rules.v4:
*filter
:INPUT ACCEPT [0:0]
...
-A INPUT -p tcp --dport 443 -j ACCEPT
-A INPUT -p udp --dport 1194 -j ACCEPT
-A FORWARD -s tun0 -j ACCEPT
-A FORWARD -s tun1 -j ACCEPT
...
Step 5: Create Client Configurations
Now, we generate the .ovpn files used by the clients. For convenience (and to rip off DigitalOcean’s guide), we’ll combine the CA certificate, Client certificate and Client’s key into the .ovpn file.
Firstly, we generate a working directory to store the files needed for the .ovpn file:
mkdir -p ${PWD}/client/files
Then, we download the example client configuration from the official Git repository:
wget -O ${PWD}/client/files/base.conf https://raw.githubusercontent.com/OpenVPN/openvpn/master/sample/sample-config-files/client.conf
Modify client.conf to match the server configuration (assuming TCP on 443):
${PWD}/client/client.conf:
remote x.x.x.x 443
proto tcp
user nobody
group nogroup
cipher AES-256-CBC
auth SHA256

# comment out these lines
;ca ca.crt
;cert client.crt
;key client.key
Replace x.x.x.x with the IP assigned to your Oracle VM instance.
The DigitalOcean guide uses a script to generate the .ovpn file, so that is what we will be doing too. It essentially concatenates all the necessary files together and spits out an .ovpn file.
${PWD}/client/make_config.sh:
#!/bin/bash

# First argument: Client identifier
PKI_DIR="../pki"
CA_DIR="../openvpn-ca"
OUTPUT_DIR="./files"
BASE_CONFIG="./files/base.conf"

cat ${BASE_CONFIG} \
    <(echo -e '<ca>') \
    ${PKI_DIR}/ca.crt \
    <(echo -e '</ca>\n<cert>') \
    ${PKI_DIR}/issued/${1}.crt \
    <(echo -e '</cert>\n<key>') \
    ${PKI_DIR}/private/${1}.key \
    <(echo -e '</key>\n<tls-auth>') \
    ${CA_DIR}/keys/ta.key \
    <(echo -e '</tls-auth>') \
    > ${OUTPUT_DIR}/${1}.ovpn
Adjust the directories to their absolute paths just to be sure. Once you are confident that the paths are accurate, give the script the executable go-ahead, and run the script with the parameter of the client name (should be client1, as generated with ./easyrsa build-client-full client nopass):
cd <path to client directory>
chmod +x make_config.sh
./make_config.sh client1
The .ovpn should be generated in the ./files directory. This file can then be transferred to another device, like your Android device or ISP-controlled router. Give it a spin, and ensure everything is in working order by:
- Checking IP address with ifconfig.so, or VPN provider internet checker;
- Checking ZeroTier connectivity by pinging peers in the same network.
Conclusion
You have successfully set up Solution Duo. Click here to go back to Part 1; otherwise, if you are satisfied with your setup, then we’re done here.
Happy Coding
CodingIndex