
A (human) index that likes to code
Also drinks way too much coffee ![]()
Moving from Travis-CI to GitHub Actions
Published Nov 15, 2020 00:30
Why the move?
In case you weren’t aware, the guys now in charge of Travis CI recently changed how their “free” plan worked. TL;DR: Open-source Travis CI is no longer fully free - instead, you will now be allocated limited amount of credits, which will get you 1,000 minutes on a Linux machine before you are forced to purchase a plan. Applying for additional free credits will be on a case-by-case basis.
Putting aside my own personal thoughts on the matter, my personal website takes anywhere from 33 seconds to 4 minutes to compile depending on cache status. This means that I can only post 400 more blog posts before I run out of credits. Hence, I needed to find another way to build and deploy my website.
Over the years, GitHub has evolved from being just another place for developers to dump their code, to a fuller suite of tools developers can use to create CI/CD pipelines from the code they create. I believe that this is a result of market demand, as a way to be competitive against platforms such as GitLab. GitHub’s offering, GitHub Actions, is another way to interact with code, issues, and pull requests without using web hooks or APIs.
As a lone maintainer of my personal blog, I find it too cumbersome to submit an application to either GitLab or Travis CI to gain their open-source offerings for free CI runner minutes. Under GitHub Action’s pricing plans, public projects get to use GitHub Actions for free. There is no application process or a need to attach a credit card to your GitHub account - you just configure the right files, push them to the repository, and GitHub Actions will automatically kick into action. Furthermore, my blog is hosted on GitHub Pages, and the source code for it is also hosted on GitHub. Hence, GitHub actions was the most relevant choice of a CI/CD runner for me.
For those of you who have used Jekyll with GitHub pages before, possibly from forking this repository, you’d know that the GitHub Pages environment can actually directly deploy Jekyll websites. However, as mentioned in this documentation by Jekyll, this only works with the
github-pagesgem. I personally use other gems, and hence I need a CI/CD runner to build and deploy my website.
How I moved
I snooped around my .travis.yml and listed out the steps it took to build and deploy my website:
- Get a Ruby & Bundler environment
- Install all the Gems listed in Gemfile or obtain them from the cache
- Build the site
- Deploy by pushing to
gh-pages
On Travis-CI, there are certain “magical” elements that abstracts away some elements of CI/CD. Hence, translating to GitHub Actions steps, the full list of steps would be:
- Pull (with
--depth=1) the website repository on themasterbranch - Pull (with
--depth=1) the website repository on thegh-pagesbranch - Get a Ruby & Bundler environment
- Install all the Gems listed in Gemfile or obtain them from the cache
- Build the site
- Copy/Move the built site to the repository on the
gh-pagesbranch - Deploy by pushing to
gh-pages.
Defining the order of “steps” is essentially what a GitHub Actions workflow does. Hence, under .github/workflows/main.yml, I listed out the steps in YAML format:
name: Build & Deploy

on:
  push:
    branches: [ master ]

jobs:
  buildNdeploy:
    runs-on: ubuntu-latest

    steps:
      - name: Checkout source
        uses: actions/checkout@v2
        with:
          path: source
          ref: 'master'
      - name: Checkout built branch
        uses: actions/checkout@v2
        with:
          path: built
          ref: 'gh-pages'
      - name: Ruby environment
        uses: ruby/setup-ruby@v1
        with:
          ruby-version: 2.5
      - name: Cache dependencies
        uses: actions/cache@v2.1.3
        with:
          path: ${{ github.workspace }}/source/vendor/bundle
          key: gem_dependencies
      - name: Install/Upgrade gems
        run: |
          cd ${{ github.workspace }}/source
          bundle install --jobs=3 --retry=3 --path=${BUNDLE_PATH:-${{ github.workspace }}/source/vendor/bundle}
          cd -
      - name: Build website
        run: |
          cd ${{ github.workspace }}/source
          bundle exec jekyll build
          cd -
      - name: Move built files to the built directory
        run: (cd ./source/_site && tar c .) | (cd ./built && tar xf -)
      - name: Deploy
        uses: ./source/.github/actions/pushToGithub
        with:
          branch: gh-pages
          repository: ${{ github.repository }}.git
Each “step” in a workflow could either run commands, like (cd ./source/_site && tar c .) | (cd ./built && tar xf -) or an action, like actions/checkout@v2. Steps are also capable of running in-repository actions, like ./source/.github/actions/pushToGithub.
(cd ./source/_site && tar c .) | (cd ./built && tar xf -)is a way to update files from one directory to another. The command is essentially piping thetarcompressed version of all the files in one directory, then extracting thattarin another directory through a pipe. This piece of geek was found in this StackOverflow post.
There are many GitHub actions available on the GitHub marketplace, which you can use directly in your workflow. I decided to make my own, since pushing to Git wasn’t rocket science, and it would be a good refresher to create a GitHub Action.
Side-quest: Creating an action that pushes to a repository
Being a GitHub Action, the CI/CD runner would already had temporary read/write permissions to my repository. Hence, all I really needed to do was to add files, add a commit message, and push to the correct repository.
This is easily done with the following lines of bash:
git add .
git commit -m "Deploy"
git push
For my setup, I’ve cloned the repository containing the gh-pages branch to a subdirectory; furthermore, I wanted to customize the username and email used for the deployment, just for flair purposes. Hence, my bash script ended up looking like this:
cd built
git config user.name "CodingIndex Deploy"
git config user.email "deploy@codingindex.xyz"
git add .
git commit -m "Deployment from GitHub runner"
git push https://github.com/${REPOSITORY} gh-pages:${BRANCH}
cd -
I placed this script in .github/actions/pushToGithub/action.sh, but it really shouldn’t matter where the script is, as long as the action’s path is specified correctly in .github/workflows/main.yml.
Next, I created .github/actions/pushToGithub/action.yml, so that GitHub recognizes the parent directory as a valid GitHub action:
name: 'Push to GitHub'
description: 'Pushes code to Github'
inputs:
  branch:
    description: Branch of the repository to push to
    required: true
  repository:
    description: Target repository
    required: true
runs:
  using: "composite"
  steps:
    - run: ${{ github.action_path }}/action.sh
      shell: bash
      env:
        BRANCH: ${{inputs.branch}}
        REPOSITORY: ${{inputs.repository}}
The action accepts 2 inputs: the branch, and the repository. Truth to be told, inputs.repository is not really needed, but I left that input just in case I decide to separate the repositories used for the source and the built version.
And just like that, pushing the resultant files will build the website, cache the dependencies (leading to an extremely fast build later on), and deploy to the gh-pages branch where the GitHub Pages environment will pick up the new changes and update the website accordingly.
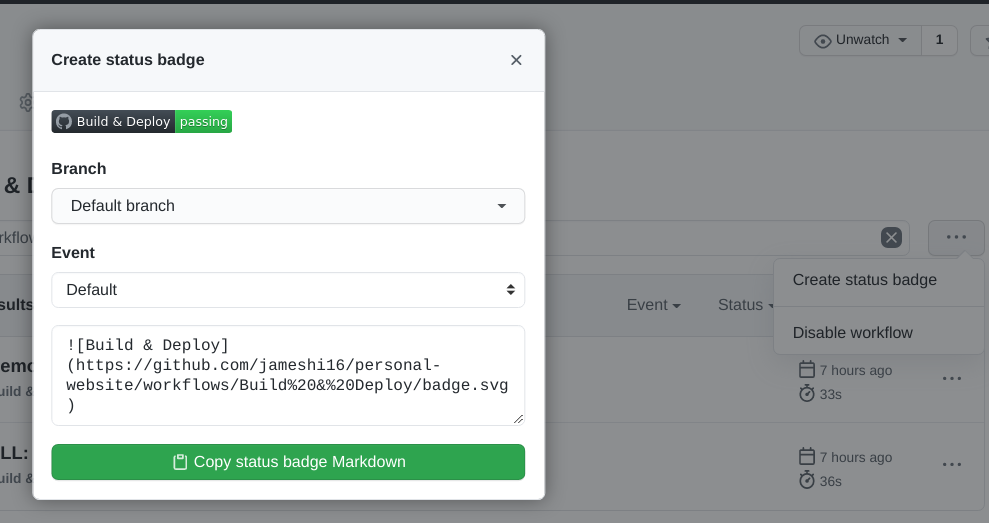
Create a status badge | Source: Me
The last step is to create a status badge for your workflow, and display it in your README proudly - for you are now a GitHub Actions warrior! Remember to delete all references to Travis CI from your repository settings (e.g. webhooks) and user account settings, if you plan to migrate away from Travis CI for all your repositories permanently.
Conclusion
It is sad that Travis CI has basically left the open source community in the dust. While their claims of user abuse might have some sort of validity, I believe that such abuse can be better handled; perhaps instead of giving everyone free one-time “trial” minutes, they should top up some credits every month. They could also limit how long a runner can run for by default for open-source projects - maybe instead of 120 minutes, give each runner 30 minutes, thereafter charge the user by credit per minute.
To add salt to the wound, Travis CI’s pricing plans are exclusive from the credits that an account can have; in other words, you need to pay for concurrency and credits separately. Interpret their pricing plans as you will.
Oh well. We’ll see where the winds take us.
Happy coding,
CodingIndex