A (human) index that likes to code
Also drinks way too much coffee ![]()
I tried to make a game...
Published Oct 06, 2020 15:30
Yo! It’s been a while.
I’ve been falling into the Hololive rabbit hole for a while now, going as far as to create one of my more “interesting” creations called 匚ㄩ尺丂乇ᗪ 爪ㄖㄖ几尺ㄩ几乇丂.
Luckily for you, my readers, this shall not be the main point of discussion for this blog post. Instead, let’s talk about FailedGame.
FailedGame
For about a month, I worked on FailedGame, which I planned to finish before a certain day in September.
You see, it was going to be my friend’s, ModelConverge’s, birthday. Typically, you would buy the birthday person a material gift, like a card, or a letter, or something. However, I wanted my gift to be special - something made from my skills. Weeks ago, my friend created a faithful MIDI soundtrack of a song he liked, and excitedly got me to listen to it. That was when I got the idea to incorporate it into some sort of a birthday gift, where I eventually settled to make a game.
Turns out, making a game was a lot harder than I thought. I made a few mistakes at the start of development that snowballed into huge issues that forced me to give up development of the project, and deliver nothing to my friend. Another possible cause could be my attempt at multi-tasking between watching Hololive streams while programming; I’m the type that must have silence to focus and get anything done.
The plan
The game would be a 2D RPG, much like those you can create using tools like RPG Maker. I wanted the movement to emulate the old classic RPG movement, i.e. the character will always move in integral unit of tiles, i.e. I don’t want “precise movement”.

Precise Movement | Source: Me
Classic RPG Movement | Source: Me
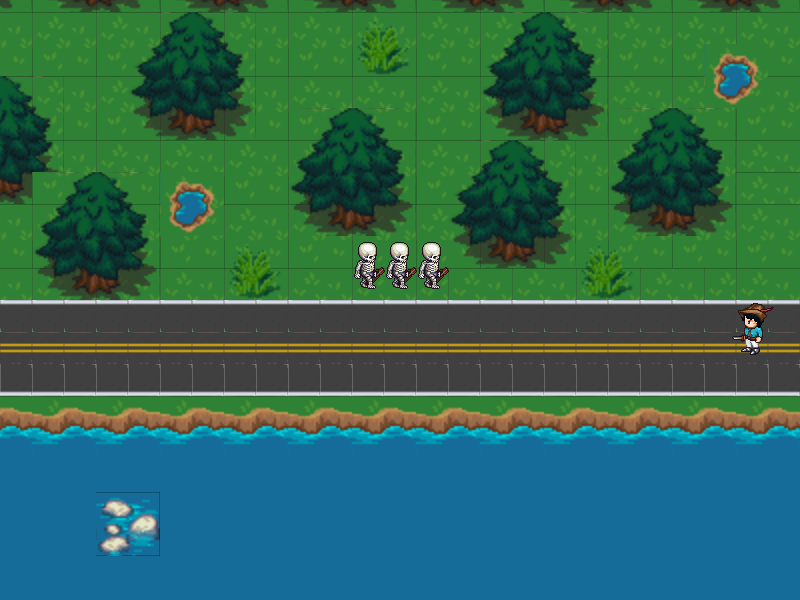
Furthermore, I wanted the combat system to be as interactive as possible; meaning, no turn-based battle system. Something like this (low quality GIF warning):
Killing skeletons on the fly | Source: Me
In terms of story, it was supposed to go like this:
- Main character is returning home from work;
- Main character enters the house, which is dark at first, then the lights are toggled, and surprise! Birthday cake on the table;
- After some time, a ninja will appear and steal the cake;
- Main character then chases the ninja to a forest, fighting hordes of Skeletons and Zombies through a maze;
- Main character then fights the ninja, who reveals that he is an alter-ego of the main character’s personality;
- Song made by friend plays, and an epic boss battle ensues.
Well, supposed to. The lack of a GIF here should imply that I didn’t get nearly as far.
So, what went wrong?
As mentioned before, most of the things that went wrong happened right at the start - I chose the wrong game framework to work with.
To develop this game, I used the Phaser 3 game framework. Phaser 3 is an extremely powerful framework with an amazing physics engine, collision detection, resource management, texture management, and so on. It even has a fallback mechanism for rendering and hence works on almost any platform that supports a browser and JavaScript. Furthermore, it’s open-source and has an extensive API documentation, alongside a large community.
“So…” I hear you ask. “What’s wrong with an extremely powerful game framework?”
At the start, I had no doubt in my mind that Phaser would be sufficient for my needs, as it could practically do everything imaginable - however, problems came when I tried to limit the vast capabilities of the Phaser framework. In other words, the issue does not lie in the game framework itself - the issue lies in what I was trying to do.
You see, in Phaser 3, you can create sprites and let them interact with the world via physics in a short amount of time: if you go through their tutorial, you’d create a 2D platformer complete with ball physics, collision detection with the world, and a scoring system. From the surface, Phaser was a perfect fit, as I wanted my sprite to collide with certain tiles in the world, the world boundary and have particle physics when I cast spells; much like what is accomplished in the tutorial.
Hence, I chose to use the physics engine that came with Phaser, and decided to make an Arcade (Phaser lingo for stuff-affected-by-physics) type game. And ho boy, did that create a plethora of problems for me.
Problem 1: Setting up the project
I know that there is a Phaser 3 Project Template for webpack setup. But, FailedGame was an educational project, so I decided to set it up mostly from scratch. This meant installing and configuring webpack, babel, and the relevant loaders required for the project. If you have looked at the source, you would realize that there is no .html file - that’s the work of the HtmlWebpackPlugin, which automatically generates one based on the contents of index.js. I did that.
Learning how to configure webpack and babel from scratch taught me to appreciate tools like npx create-react-app; in the modern ecosystem of JavaScript frameworks, boilerplate configuration is time-consuming and aggravating. This post describes what needs to be in a typical JavaScript developer’s toolchain, how volatile knowledge is in the JavaScript world, and how annoying it feels to do something simple in JavaScript.
If FailedGame wasn’t an educational project, the best option would have been to use the CDN version of Phaser 3, followed by using the Project Template, followed by doing… whatever I’ve done here.
You can see the configurations I’ve created in the repository - I’m sure there are many mistakes in the configuration, but I’ve tried separating the dev environment configuration and the production environment configuration, albiet by the difference of an inline-source-map versus a source-map. To understand why it is viable to include a source map in production, read this article; it boils down to “it’s easier to debug & find out where a problem is in production”.
Problem 2: Sizes mismatch
If you know me in real life, I failed art in Secondary School. I have an artistic score lower than absolute zero, which should be impossible but ¯\_(ツ)_/¯. This essentially means that I can’t make tilesheets, draw sprites, make projectiles, or even make music (I know nuts about music). Hence, I needed to find online resources, like OpenGameArt; you can find the exact tilesheets I used in the Github repo.
An issue with crowd-sourcing is that sometimes, you get tilesheets that seem to practice individualism - they have different tile sizes, spacing, margin, etc. The disparity between these tilesheets should be rectified somehow, making the task seem like the data cleaning stage before feeding image inputs into a machine learning model. Furthermore, I obtained my sprites from a generator that spits out 64x64 sprites, a stark contrast from the typical tilesheet sizes of 16x16 per tile.

My player character | Source: Me
So, I wrote a Python script to standardize the format of all the tilesheets (luckily I only had two variants of tilesheets). To standardize the scaling between the sprites and the tilesheets, I had a few options:
- Scale the 64x64 sprite down to 32x32 pixels;
- Scale 16x16 tilesheets up to 32x32 pixels;
- Scale by transforming in the game.
NOTE: The reason why I wanted the sprite size (intended: 32x32) to be larger than the tilesize (intended: 16x16) is because the sprite looks tiny compared to its environment if I scaled it down to 16x16 pixels.
Tiny player | Source: Me
I chose option 3 to avoid the effects of scaling artifacts, and make the game play nice with Phaser.Scene’s zooming functionality. In the end, sprites were effectively 32x32 pixels, tiles were effectively 16x16 pixels, with the camera zoomed in by 2.
Problem 3: ResourceManager
If you looked at the Git commit history, I tried making a resource maanger at one point, because I was concerned about memory usage. But after spending approximately 24 manhours on it, I gave up and decided to let Phaser take the wheel.
The factors for consideration to drop ResourceManager were:
- My game was going to be small; all the resources loaded in memory together would definitely be less than 100MB;
- I have no need to handle large levels, or many levels at once. Moreover, by using
Phaser.Scenecorrectly, scenes that are destroyed probably also destroys any unused resources; - It was eating up a lot of time that I could have spent elsewhere.
In a nutshell, bad decisions led to crazy amount of work with no visible benefits!
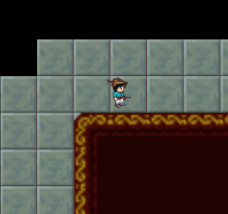
Problem 4: Sprite spawns in the middle of two tiles
If you recall from “Problem 2”, my sprites have a size of 32x32, while the tiles are 16x16. Hence, the sprite spawns like this on the tilemap by default:
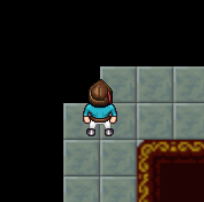
Middle of two tiles | Source: Me
To fix this problem, I shifted the origin point of the sprite in the code. Apparently, the origin point is defined as the fraction of the full width/height of one frame in the sprite. In other words:
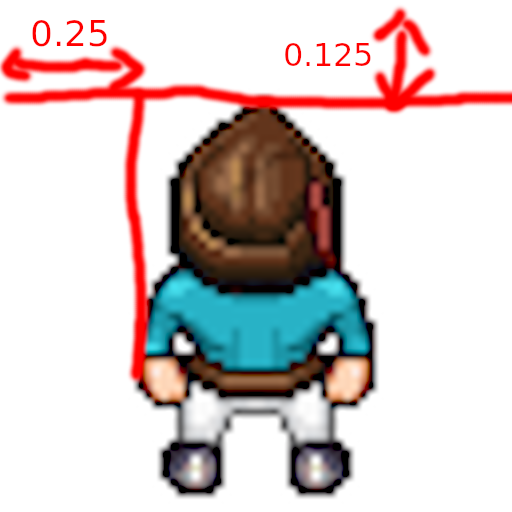
Origin points | Source: Me
Believe it or not, this took me a while to figure out, because I was trying to determine the origin points by visualizing it in my head. In hindsight, drawing a simple diagram like the above would have saved me lots of trouble.
Problem 5: Discrete movement
As one may recall, I wanted my sprite to have the “Classic RPG movement” feel.
However, by default, you are expected to use the Phaser.Physics.Arcade.Sprite.setVelocity or Phaser.Physics.Arcade.Sprite.setAcceleration functions for anything related to movement. Our character hence moves in a continuous manner, and can stop at any arbitrary position. In other words, we see the following behaviour for movement:
Character stops anywhere | Source: Me
To implement the behaviour that I wanted, I had to snap the sprite to the correct tile during and after movement. One method I tried was to set the velocity of the sprite to a multiple of a tile’s length, and as soon as the input key is released, stop the sprite at the nearest multiple. This meant that I could define velocity in terms of tiles.
When I implemented the solution, it seemed to have worked - however, as time progresses, the sprite drifts by a tiny bit:
Sprite drifting | Source: Me
The subsequent no-brainer fix is to try and “snap” the sprite to the tile at the end of every movement, but this occurs:

Sprite rubber-banding + extraneous movement | Source: Me
The sprite sometimes experiences rubber-banding, and may walk an extra tile!
Hence, I was forced to remove my reliance on Phaser.Physics.Arcade.Sprite.setVelocity, and instead used my own method to move the player. Here is how it works:
- When a direction input is received, a movement function is added to a map (the map key being a representation of the sprite);
- Every call to
update()calls the relevant movement functions with the time delta (for me, this is every 16 milliseconds) since the last call toupdate(); - In the movement function,
Phaser.Physics.Arcade.Sprite.setPositionwill be used to move the player forward, based on the time step, desired velocity, and whether the change in position will go beyond the boundry of two tiles. If it does, the player is moved to the tile instead of beyond the tile; - In the absence of a direction input, the movement function removes itself from the map, stopping all movement.
You can find the implementation in src/scripts/BaseScene.js, which results in “smoother” tile-discrete movement.
Classic RPG Movement | Source: Me
Problem 6: Collision detection
Phaser is great at collision detection. One can define groups, which can collide with other physics objects or groups, and provides a nice functional interface to handle events emitted by the collision to, say, reduce the player’s HP. Typically, if I wasn’t trying to achieve “Classic RPG movement”, I could have just used Phaser’s collision detection.
Why can’t I just use the built-in collision detection? Well, see for youself:

No longer discrete | Source: Me
The sprite collides with the blocking tile, and moves ever so slightly into the tile. This, plus my custom solution to detect movement, renders Phaser’s collision detection unusable. To fix this problem, I can either:
- Increase/decrease the size of the hitbox using
Phaser.Physics.Arcade.Sprite.setSize(orPhaser.Physics.Arcade.Sprite.input.hitArea.setSize, but I didn’t do this); - Write my own collision routine.
While setting the size of the hitbox did mitigate the issue somewhat, I didn’t want the hitbox to be at the position I set it to be (i.e. at the bottom), because I still wanted the sprite to receive arrow damage when skeletons headshot the sprite. Hence, I decided to write my own collision routine.
I figured that in a game where all movement is discrete, it’ll be waste of resources to calculate hitbox intersections - instead, I decided to just check the tile before the sprite, in whichever direction the sprite is facing. So:
- If a sprite is facing left, check if (
sprite.x - TILESIZE,sprite.y) has a blocking tile; - If a sprite is facing right, check if (
sprite.x + TILESIZE,sprite.y) has a blocking tile; - If a sprite is facing up, check if (
sprite.x,sprite.y - TILESIZE) has a blocking tile; - If a sprite is facing down, check if (
sprite.x,sprite.y + TILESIZE) has a blocking tile.
A sub-problem I faced as I implemented my own collision detection was how co-ordinates are calculated by Phaser - which is wherever the origin point is. As you recall, the origin point is at the top-left of the sprite, meaning that I had to translate the co-ordinates to the bottom of the sprite before I could perform collision detection.
After accounting for some annoying 1px-off errors, the result is proper collision detection:
Good moves! | Source: Me
With my own collision detection method with tiles, I could then use Phaser’s accurate collision detection with projectiles and other sprites by reducing the sprite hitbox to 16px by 32px. All clear ![]() .
.
Problem 7: A* Search Algorithm
The A* Search Algorithm is a graph-traversal algorithm that finds the optimal (based on heuristics) path to a destination point from a source point.
When I first read about the A* Search Algorithm, I thought it had to be some kind of alien magical algorithm that could somehow find a path that avoids obstacles using complex mathematical equations that was way out of my league. Well, that was until I paused my Hololive stream and actually read what it was about, and how the algorithm worked.
Turns out, it was way simpler than I thought; I implemented a version in Python relatively quickly. Essentially, the A* Search Algorithm calculates a score based on heuristics (which is just a distance function you choose based on your application) and distance from the source point for the eight squares around the point in question, starting from the source point. The algorithm then moves on the next point with the least score from the source point, and repeats the score calculation. It’s a little hard to describe with words, so here is a GIF:
A* Search Algorithm | Source: Greg Jennings & qiao
Two list-like data structures are involved in the A* Search Algorithm, the open list (to be searched), and the closed list (already seached / blocked). These lists benefit the most from a heap with the score determining its position in the tree, where the lowest score is on top of the heap (i.e. min-heap). A heap can be implemented with a binary tree.
Furthermore, there is a need to quickly obtain the existence of points within the two lists during the execution of the A* Search Algorithm; in a heap, searching for keys would have a time complexity of O(n), which is not great. To mitigate this problem, we introduce a companion hash table, which has a search time complexity of O(1). Hence, if I decided to use a heap + hash table, insertion would be O(log n), search would be O(1), deletion would be O(log n), and cancer would be cured.
For some reason, I decided to go with a heap + binary search tree. Don’t ask me why, but that’s how I did it; I probably thought something along the lines of: they’re both binary trees, so why not ![]() . This meant that insertion is
. This meant that insertion is O(log n), search is O(log n) and deletion is O(log n) at best - I reap what I sow!
One last thing about the A* Search Algorithm and its applications: in typical games made by studios, map sizes are huge. Hence, it might not be wise to run the entire algorithm for every path-taking object in the game; instead, splicing the path after the first path search is a good idea. Here is an article that explains how to deal with moving obstacles effectively while consuming not-so-much CPU cycles every call to update() with any graph search algorithm. As my game is small (and I need to get this done quickly), I decided to ignore optimizing the algorithm for larger maps.

Pathfinding in-game | Source: Me
The path-finding you see in the GIF also included logic for the skeleton to stand still after having line of sight with the player.
Problem 8: Rendering issues
Thinking that I’ve resolved most of the problems, I decided to make a new map that will actually be included in the game. After having a jolly-good time of mapping, I loaded it up in the game and saw this:
The tiles are glitching? | Source: Me
In hindsight, the problem was very simple - but troubleshooting the problem as it occurred was a pain in the neck. I initially thought it was a tilesheet problem, so I examined the tilesheet on an image editor and didn’t find anything. Then, I changed the renderer to use CANVAS rending instead of AUTO (which defaults to WEBGL). Then, I changed tilesheets, changed zoom settings, and rescaled things. None of these solutions worked.
Giving up, I searched DuckDuckGo for “Tile glitch Phaser 3” and “Black gaps tile Phaser 3”, but found no solutions that worked. After several days of frustruation, I searched my problem on Google instead, and no thanks to DuckDuckGo, I finally found leads. Of all the possible solutions, this thread eventually led me to a solution that worked.
The problem was known as tile-bleeding, and could be fixed by extruding the tiles on the tilesheet by 1 pixel. I would then read the tiles off the tilesheets as 16px by 16px tiles with 1px spacing and margin. The tool that was included in the forum thread didn’t install right for me (probably a missing package or something, I was running out of time to check), so I decided to write my own using the Pillow library. The code is available in the FailedGame repo.
After importing the image, and updating the configuration on Tiled, the map editor, the result is a game with no rendering artifacts.

Fixed | Source: Me
Problem 9: Time’s up
And with that, I ran out of time to deliver the project to my friend. I congratulated him for being born, and asked for a few extra days - unfortunately, the purpose of the game was lost as the significant day passed.
Hence, I decided to abandon the project. FailedGame had projectile parrying, skeleton slaying, skeleton shooting, collision detection, NPC pathfinding and an initial map. R.I.P FailedGame.
This won’t be the first time I’m abandoning a project, neither will it be the last - I hope to eventually be capable of delivering projects at breakneck speeds, even if it involved 8 (or 9 if you include me watching Hololive streams like a addicted lunatic) apostles of time wasters. However, through the experience of developing the game, I’ve learned a lot - from setting up a webpack project from scratch, to various issues around using a tool not designed for its purpose, to learning how to accept defeat and move on.
Conclusion
What a ride! I hope the content of the blog post has been as engaging to you as it was for me to write - I paused my Hololive stream for this!
If you would like to try your hand at making games that is not a Classic JRPG, do give Phaser a try. It is a powerful game framework that’ll bootstrap your way to an awesome indie title! If you’re not looking to make a game, then I hope my takeaways for the A* Search Algorithm, and my setting up of a webpack project without a pre-configured template gave you some insights; although I do apologize for the quality of those insights, since it’s from a complete novice like me.
Other than that, please subscribe to my RSS feeds! If you like anime, subscribe to the Anime RSS feed, if you like technical content, subscribe to the main RSS feed.
Until next time, Ciao!
Happy coding
CodingIndex