A (human) index that likes to code
Also drinks way too much coffee ![]()
Angular CI/CD with GitHub Actions
Published May 27, 2020 09:00
Recently, I needed to setup a functional CI/CD pipeline for an Angular Project. Given how hard GitHub has been pushing their “GitHub Actions” feature, I decided to give it a try. Here is how to setup CI/CD for an fresh Angular project on GitHub.
Step 0: Concepts
GitHub workflows uses GitHub actions, and GitHub actions are ideally public repositories that are published on the Marketplace. As of writing, first-class support for private GitHub repository actions does not exist.
There are three main ways around it:
- Git Submodules,
- Cloning the action with an access token on run,
- Local GitHub actions
There are two types of GitHub Actions:
- Docker container or,
- JavaScript.
The main difference between the two actions is that JavaScript actions should not call other executables (i.e. not dependent on specific executables), while Docker container actions can (because they are containers).
For this blog post, I’ll use local Docker container GitHub actions for both CI and CD. The below represents a logical architecture of what I’m gonna setup:
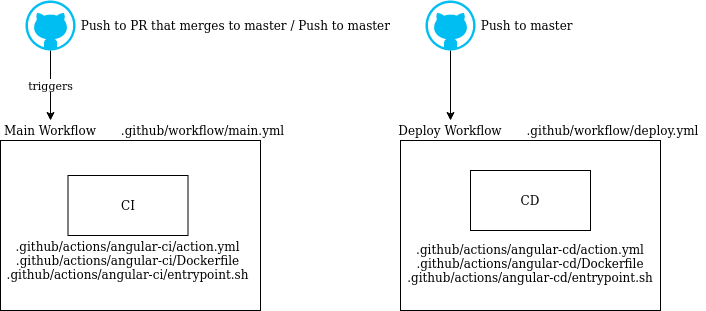
Logical architecture | Source: Me
Step 1: Installing the GitHub Actions runner
As I’m setting up GitHub Actions for a private repository, I decided to use a self-hosted GitHub actions runner, since I have an unused VPS server lying around doing nothing. At the time of writing, a self-hosted GitHub actions runner is not required, as GitHub’s Free Plan gives 2,000 action minutes per month for private repositories which seems enough for a few small projects.
Installing the GitHub Actions runner can be easily done by following the instructions on this GitHub help page. A unit service can then be created by following the instructions on this other GitHub help page, although I wrote mine manually just for giggles.
If you’re using Docker container actions, ensure that the environment has Docker installed, and is accessible by the user running the GitHub action runner. If you’re using Javascript actions, you should install actions/toolkit.
After following the steps properly, I observe that the runner pops up in my settings page:
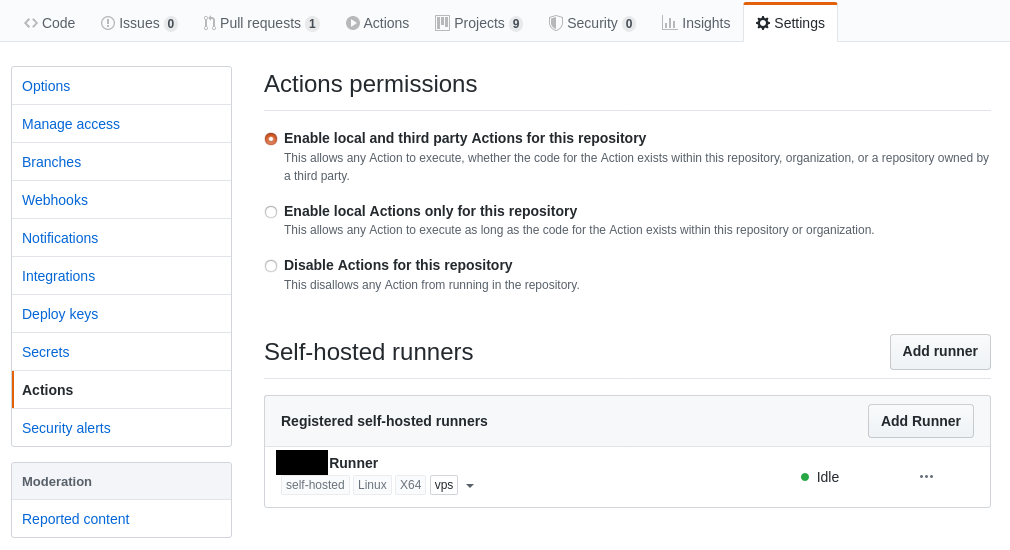
Self-hosted GitHub Runner | Source: Me
I also added the vps tag, but it’s not really useful when I only have one self-hosted runner. Tagging can help GitHub workflows to differentiate between machines; for example, only distributing the GPU-intensive workflow to GPU-capable machines.
Step 2: Continuous Integration
When developers make changes to the codebase, they generally want to ensure that the incoming code is high quality and maintainable. This usually involves:
- Stringent Pull Request reviews
- An automation process checking for the following things:
- Is it buildable?
- Is it good on the lint?
- Are the tests passing?
Angular has a few straightforward CLI commands that can test for code quality, namely:
ng buildng lintng test && ng e2e
Hence, all I need to do now is to translate our CLI commands into a GitHub action. Luckily, colbyhill21 has already made a full CI action for Angular, which is easy to integrate into your own GitHub workflow.
However, I decided to reinvent the wheel, because I’m bored and have nothing better to do. Furthermore, understanding how the black box works speeds up debugging issues pertaining to ng test and ng e2e, which I experienced while writing this blog post.
Let’s create the directories required for our local Github action.
$ mkdir -p .github/actions/angular-ci
I install nodejs, puppeteer (for unit testing & end-to-end testing) and @angular/cli in .github/actions/angular-ci/Dockerfile:
FROM node:12-slim

# https://github.com/puppeteer/puppeteer/blob/master/docs/troubleshooting.md#running-puppeteer-in-docker
RUN apt-get update \
    && apt-get install -y wget gnupg procps \
    && wget -q -O - https://dl-ssl.google.com/linux/linux_signing_key.pub | apt-key add - \
    && sh -c 'echo "deb [arch=amd64] http://dl.google.com/linux/chrome/deb/ stable main" >> /etc/apt/sources.list.d/google.list' \
    && apt-get update \
    && apt-get install -y google-chrome-unstable fonts-ipafont-gothic fonts-wqy-zenhei fonts-thai-tlwg fonts-kacst fonts-freefont-ttf \
      --no-install-recommends \
    && rm -rf /var/lib/apt/lists/*

# Install Angular CLI
RUN npm install --unsafe-perm=true --allow-root -g @angular/cli puppeteer

# Entrypoint
COPY entrypoint.sh /entrypoint.sh
RUN chmod +x /entrypoint.sh
ENTRYPOINT ["/entrypoint.sh"]
This tells docker to build an image that has the environment to run Angular CLI commands for testing. Next, I create a GitHub action, and tell it to run the Docker image. In .github/actions/angular-ci/action.yml:
name: 'Angular CI'
description: 'Runs a full suite of angular commands'
runs:
  using: 'docker'
  image: 'Dockerfile'
Running Angular tests implies some level of interaction with the browser - since I don’t have GUI access to the browser when a GitHub action is running, I configured the tests to run on a headless browser. Firstly there’s karma.conf.js, the configuration file for Angular’s unit testing framework:
module.exports = function (config) {
    browsers: ['ChromeHeadless', 'ChromeHeadlessCI'],
    ...,
    customLaunchers: {
        ChromeHeadlessCI: {
            base: 'ChromeHeadless',
            flags: ['--no-sandbox', '--disable-translate', '--disable-extensions', '--remote-debugging-port=9223']
        }
    }
}
Then, I re-configured ./e2e/protractor.conf.js, the end-to-end testing framework:
exports.config = {
    ...,
    capabilities: {
        browser: 'chrome',
        'goog:chromeOptions': {
            args: ['--no-sandbox', '--headless', '--disable-gpu, '--window-size=800,600']
        }
    }
}
The testing frameworks now use headless browsers to perform their tests, which allows me to do testing in a Docker container, and consequently, in the GitHub action runner.
With a GitHub action and a properly configured project, I can now configure a GitHub workflow, which is kinda like an “main” file to our actions. The workflow allows me to instruct GitHub to perform certain GitHub actions on certain repository events, like pushes or pull request activity. First, I create the necessary folders:
$ mkdir -p .github/workflows
Then I populate .github/workflows/main.yml:
name: CI

on:
  push:
    branches: [ master ]
  pull_request:
    branches: [ master ]

jobs:
  suite:
    runs-on: [self-hosted, linux]
    steps:
      - name: Checkout repository
        uses: actions/checkout@v2
      - name: Run CI
        uses: ./.github/actions/angular-ci
The runs-on: [self-hosted, linux] line is necessary for me to select the right GitHub actions runner. You can replace that line with runs-on: ubuntu-latest if you’re using GitHub’s runners at the cost of your plan’s GitHub action minutes.
Step 3: Continuous Deployment
Continuous Deployment is slightly easier; all I needed to do is to build, copy and paste everything in dist/project_name (replace project_name with your Angular project name) into a folder on my web server.
Let’s reuse the angular-ci action by copying .github/actions/angular-ci, to .github/actions/angular-cd.
Then, edit .github/actions/angular-cd/action.yml:
name: 'Angular CD'
description: 'Deploy to production'
inputs:
  sshkey:
    description: 'SSH Key to access production server'
    required: true
  user:
    description: 'Username for the production server'
    required: true
  host:
    description: 'Production Server address'
    required: true
  knownhosts:
    description: 'Host keys to identify the production server'
    required: true
runs:
  using: 'docker'
  image: 'Dockerfile'
  args:
    - ${{ inputs.sshkey } }
    - ${{ inputs.user }}
    - ${{ inputs.host }}
    - ${{ inputs.knownhosts }}
I required myself to deploy via SSH safely. This means two things:
- SSH Keys for authentication and,
- Specifying the web server’s host keys to ensure its identity.
Hence, I introduced inputs into the action.yml file, allowing the workflow to specify the SSH key and Host keys. inputs is a method to specify parameters that can be used throughout the execution of the action; they will appear as environment variables prefixed with INPUT_. For example, sshkey will be exposed as $INPUT_SSHKEY during the execution of the action.
To ensure no Man-In-The-Middle attacks happen, I decided to specify host keys too. Essentially, we identify the production machine on our location machine first:
$ ssh-keyscan -H <your hostname here>
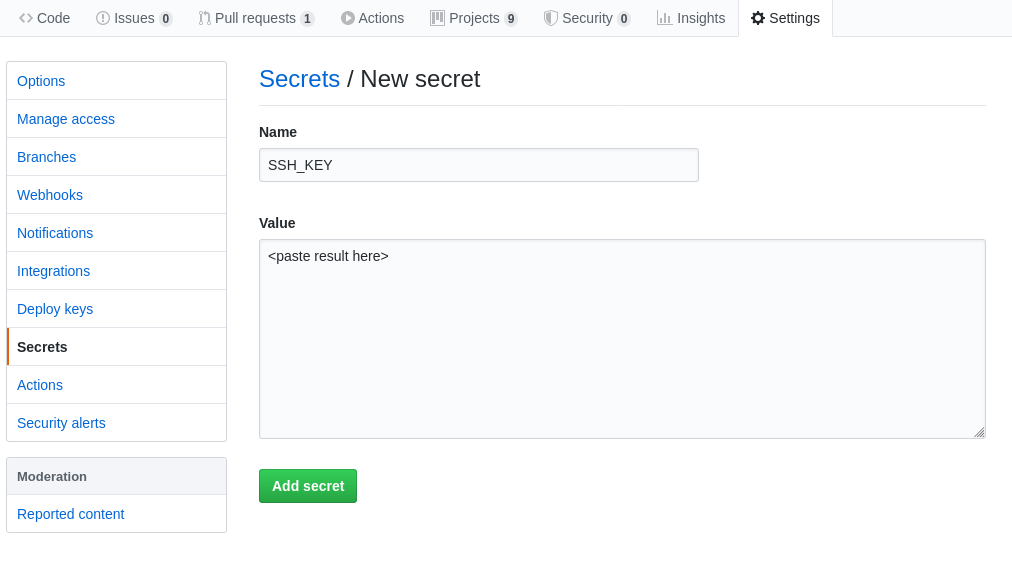
Then, we store the result into a GitHub secret (found under Settings > Secrets > Add secret):
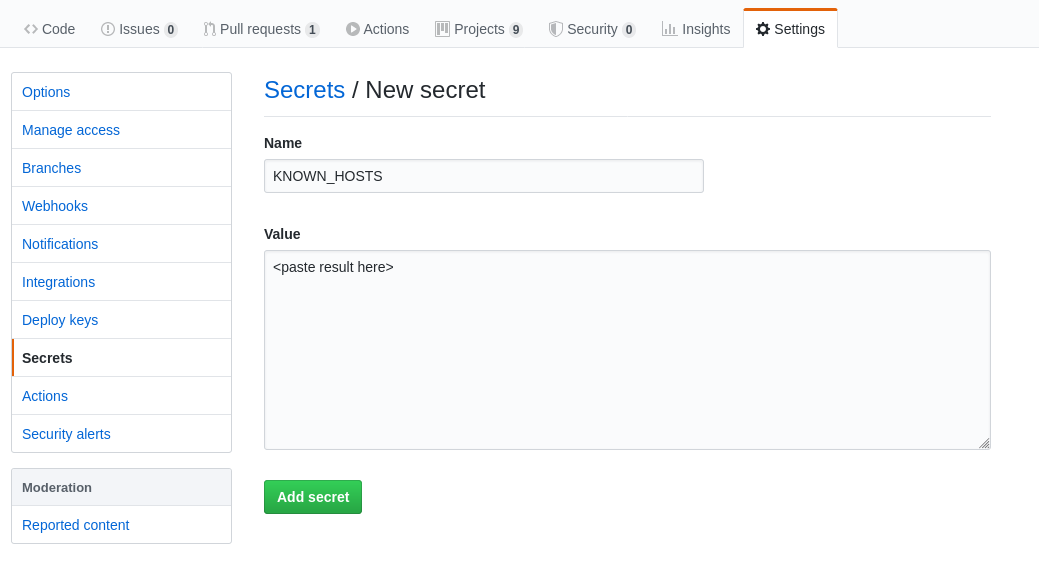
Add the host key secret | Source: Me
While I’m specifying the secrets, I might as well generate the private key secret on the web server too:
$ # THIS IS ON THE WEB-SERVER
$ ssh-keygen
Generating public/private rsa key pair.
Enter file in which to save the key (/home/ubuntu/.ssh/id_rsa):
Enter passphrase (empty for no passphrase):
Enter same passphrase again:
Your identification has been saved in test.
Your public key has been saved in test.pub.
The key fingerprint is:
SHA256:GCVhv6Of2eOpPzfwlBMi4ohzuBiSFjdOdVX/xaA7IsE ubuntu@Desktop
The key\'s randomart image is:
+---[RSA 3072]----+
|      +.o...  .  |
|     o *    .. o |
|    . o E   ..  o|
| . +  .o.o. ... .|
| .=o.o..S...oo . |
|+.+.o .. o..+.   |
|oo +  .    + .   |
|. .    . +o.+    |
|        =+=+ .   |
+----[SHA256]-----+
$ cat /home/ubuntu/.ssh/id_rsa
<private key contents>
Again, store the result into a GitHub secret:
Add the private key secret | Source: Me
Now I have two secrets.
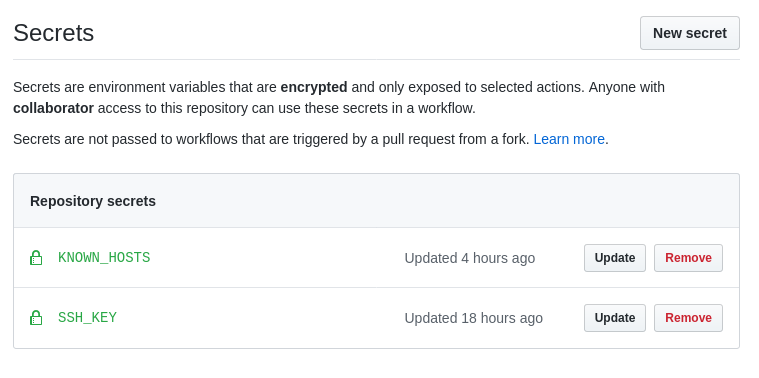
Two secrets | Source: Me
Now, I configure the Dockerfile and entrypoint.sh files under the new action.
.github/actions/angular-cd/Dockerfile:
FROM node:12-slim

# Install SSH and SCP
RUN apt-get update && apt-get -y install ssh

# Install Angular CLI
RUN npm install --unsafe-perm=true --allow-root -g @angular/cli puppeteer

# Entrypoint
COPY entrypoint.sh /entrypoint.sh
RUN chmod +x /entrypoint.sh
ENTRYPOINT ["/entrypoint.sh"]
.github/actions/angular-cd/entrypoint.sh:
#!/bin/bash

echo "======[ Dependencies ]======"
npm install

echo "======[ Build ]======"
ng build --prod

eval $(ssh-agent -s)
mkdir -p $HOME/.ssh
echo "$INPUT_KNOWNHOSTS" > $HOME/.ssh/known_hosts
chmod 644 $HOME/.ssh/known_hosts
ssh-add <(echo "$INPUT_SSHKEY")
ssh $INPUT_USER@$INPUT_HOST "rm -rf /var/www/html/*"
scp -r dist/project_name_here/* $INPUT_USER@$INPUT_HOST:/var/www/html/.
ssh-agent -k

rm -rf node_modules/
rm -rf dist/
The Dockerfile installs the required pre-requisites, and the entrypoint.sh file builds the project and copies the contents of dist/project_name/* into the deployment folder.
Finally, I create a workflow to utilize our action:
.github/workflows/deploy.yml:
name: Deploy

on:
  push:
    branches: [ master ]

jobs:
  deploy:
    runs-on: [self-hosted, linux]
    steps:
      - name: Checkout repository
        uses: actions/checkout@v2
      - name: Run Continuous Deploy
        uses: ./.github/actions/angular-cd
        with:
          sshkey: ${{ secrets.SSH_KEY }}
          user: PUT_YOUR_SSH_USER_HERE
          host: PUT_YOUR_HOST_HERE
          knownhosts: ${{ secrets.KNOWN_HOSTS }}
Since the angular-cd action requires some inputs, I specified it in this workflow. secrets accesses the encrypted secrets configured earlier, which is then passed to the GitHub action runner to complete its job.
Conclusion
Done! After committing, pushing and creating a PR, the workflows should kick into action immediately, checking the repository for lint, build and test errors. After merging the PR into master, it should trigger the deploy workflow, and your code will be automagically deployed.
Happy coding,
CodingIndex